
Featured
This IKEA dresser hack is so easy and perfect for anyone to try! I was looking for a specific type of dresser, but I couldn’t find one within budget. That’s when I decided I would hack an IKEA dresser. It’s amazing how a little decorative moulding, paint and new hardware completely transformed this piece! Here […]
From Our Home to Yours
WElcome to the blog
I started this blog as a place to share DIY's, home finds and home decor inspiration.
Welcome to our Tijeras Creek Kitchen Project Reveal! I am so excited to reveal this kitchen to you. When I first decided to start helping people design their dream spaces, I knew one thing for sure…Not only did I want to create beautiful spaces, but I wanted to make sure they were tailored to my client’s needs and lifestyle. That is exactly what we did for the Tijeras Creek kitchen remodel!
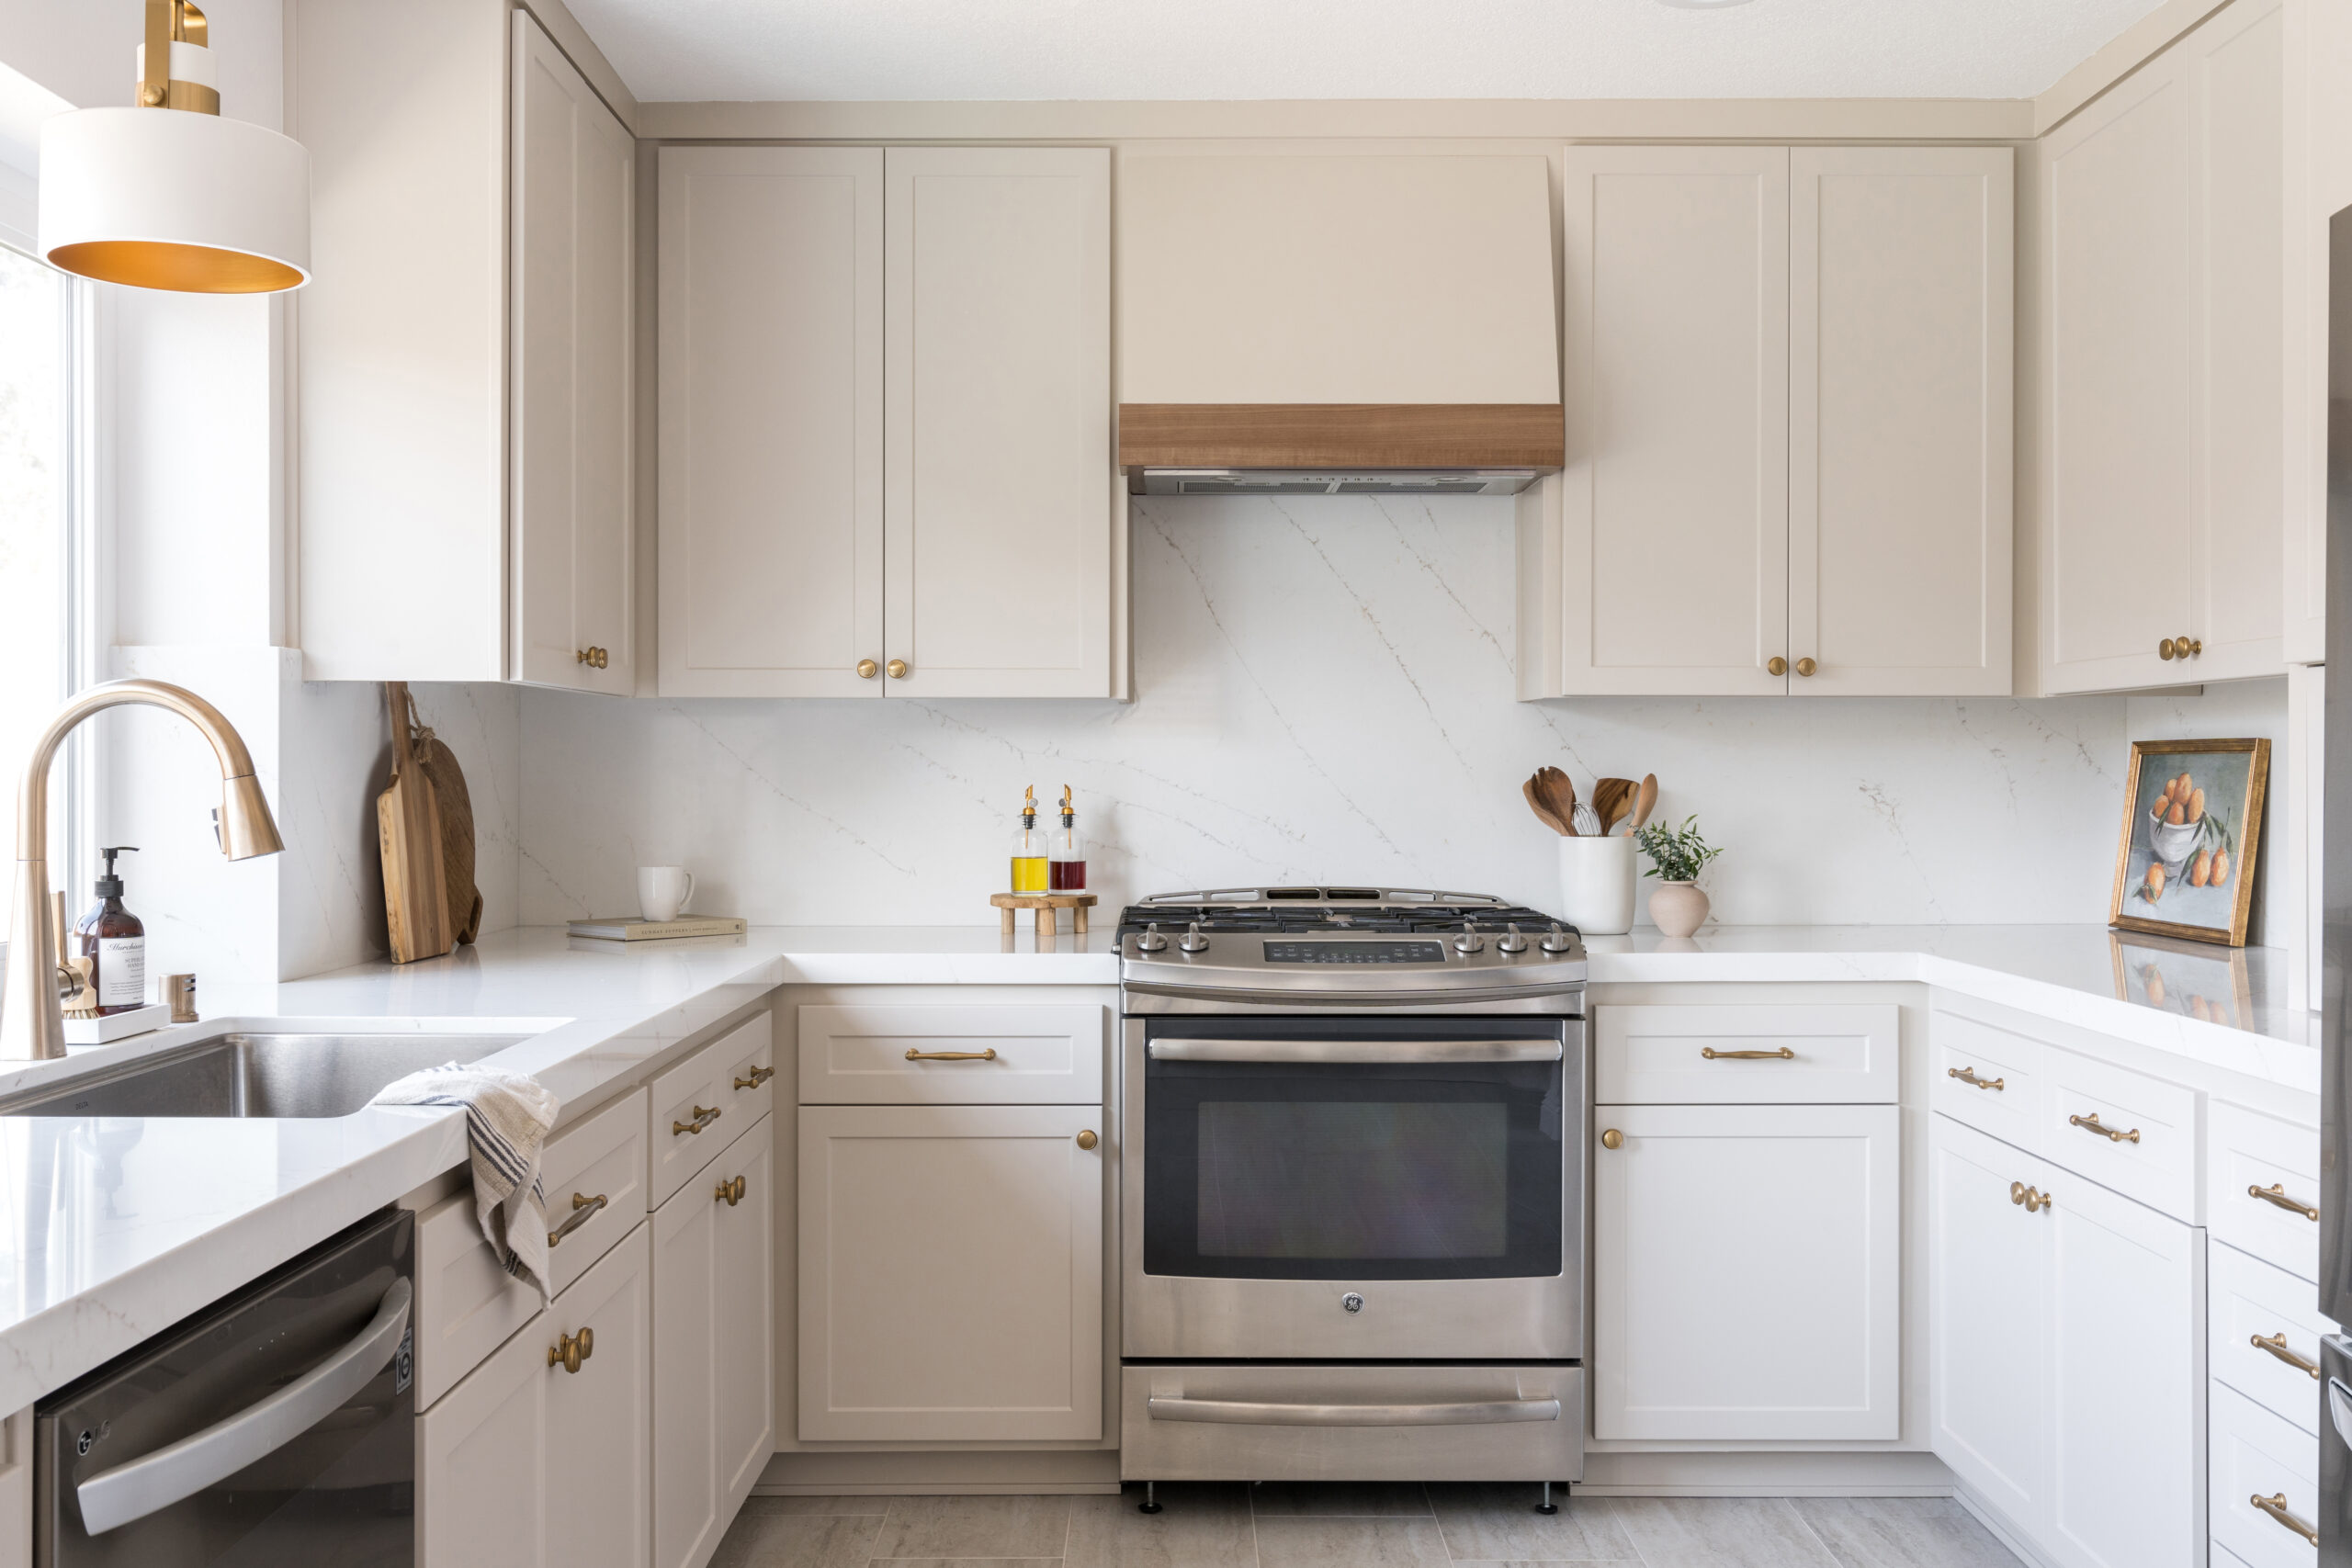
Our main goal for this kitchen was to create a space that felt warm and inviting while making the kitchen more functional. We made several modifications to the layout to achieve this. We extended the kitchen by one base and wall cabinet, added an appliance garage, replaced the microwave with a custom hood vent, and added a pull-out trash can.
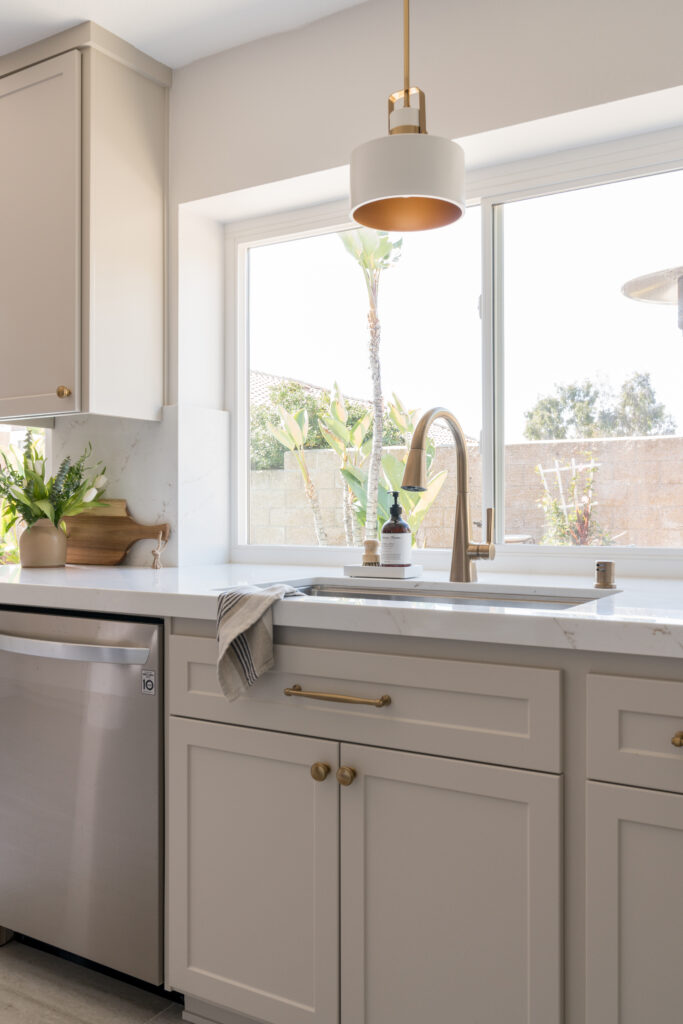
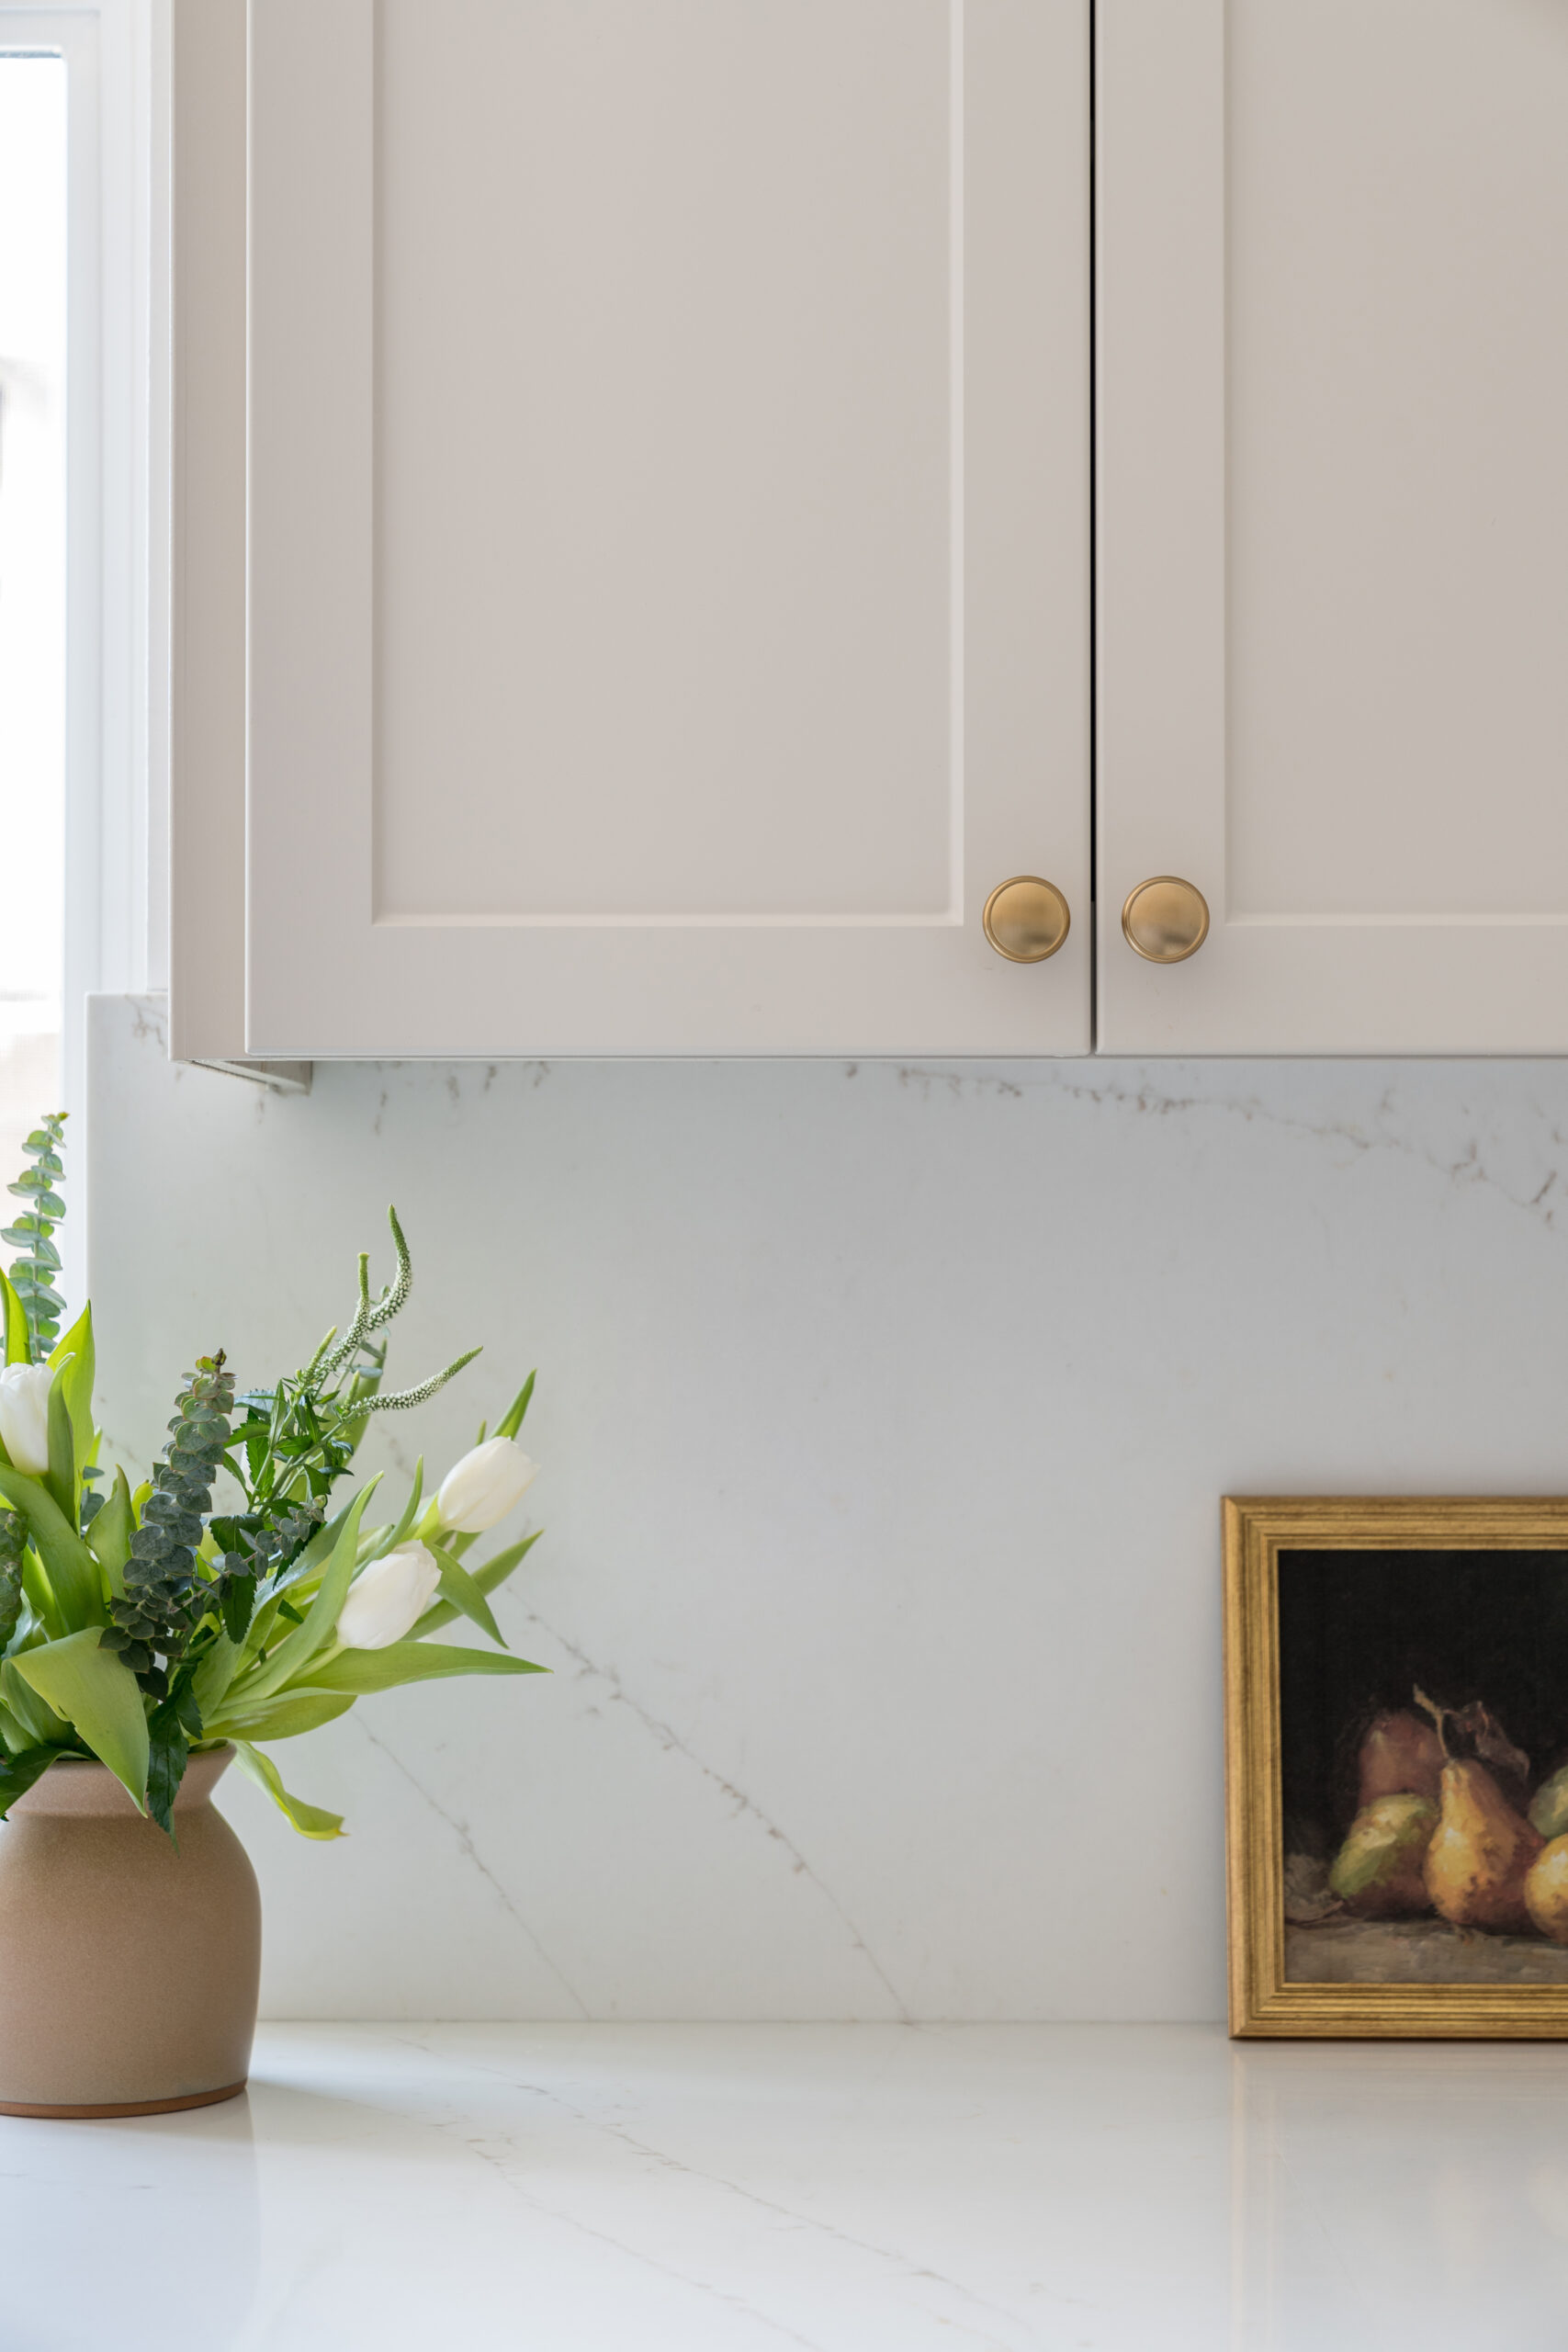
My favorite decision that we made for this project was to continue the quartz countertop up as the backsplash. It created a seamless transition and elevated the overall aesthetic of the kitchen.
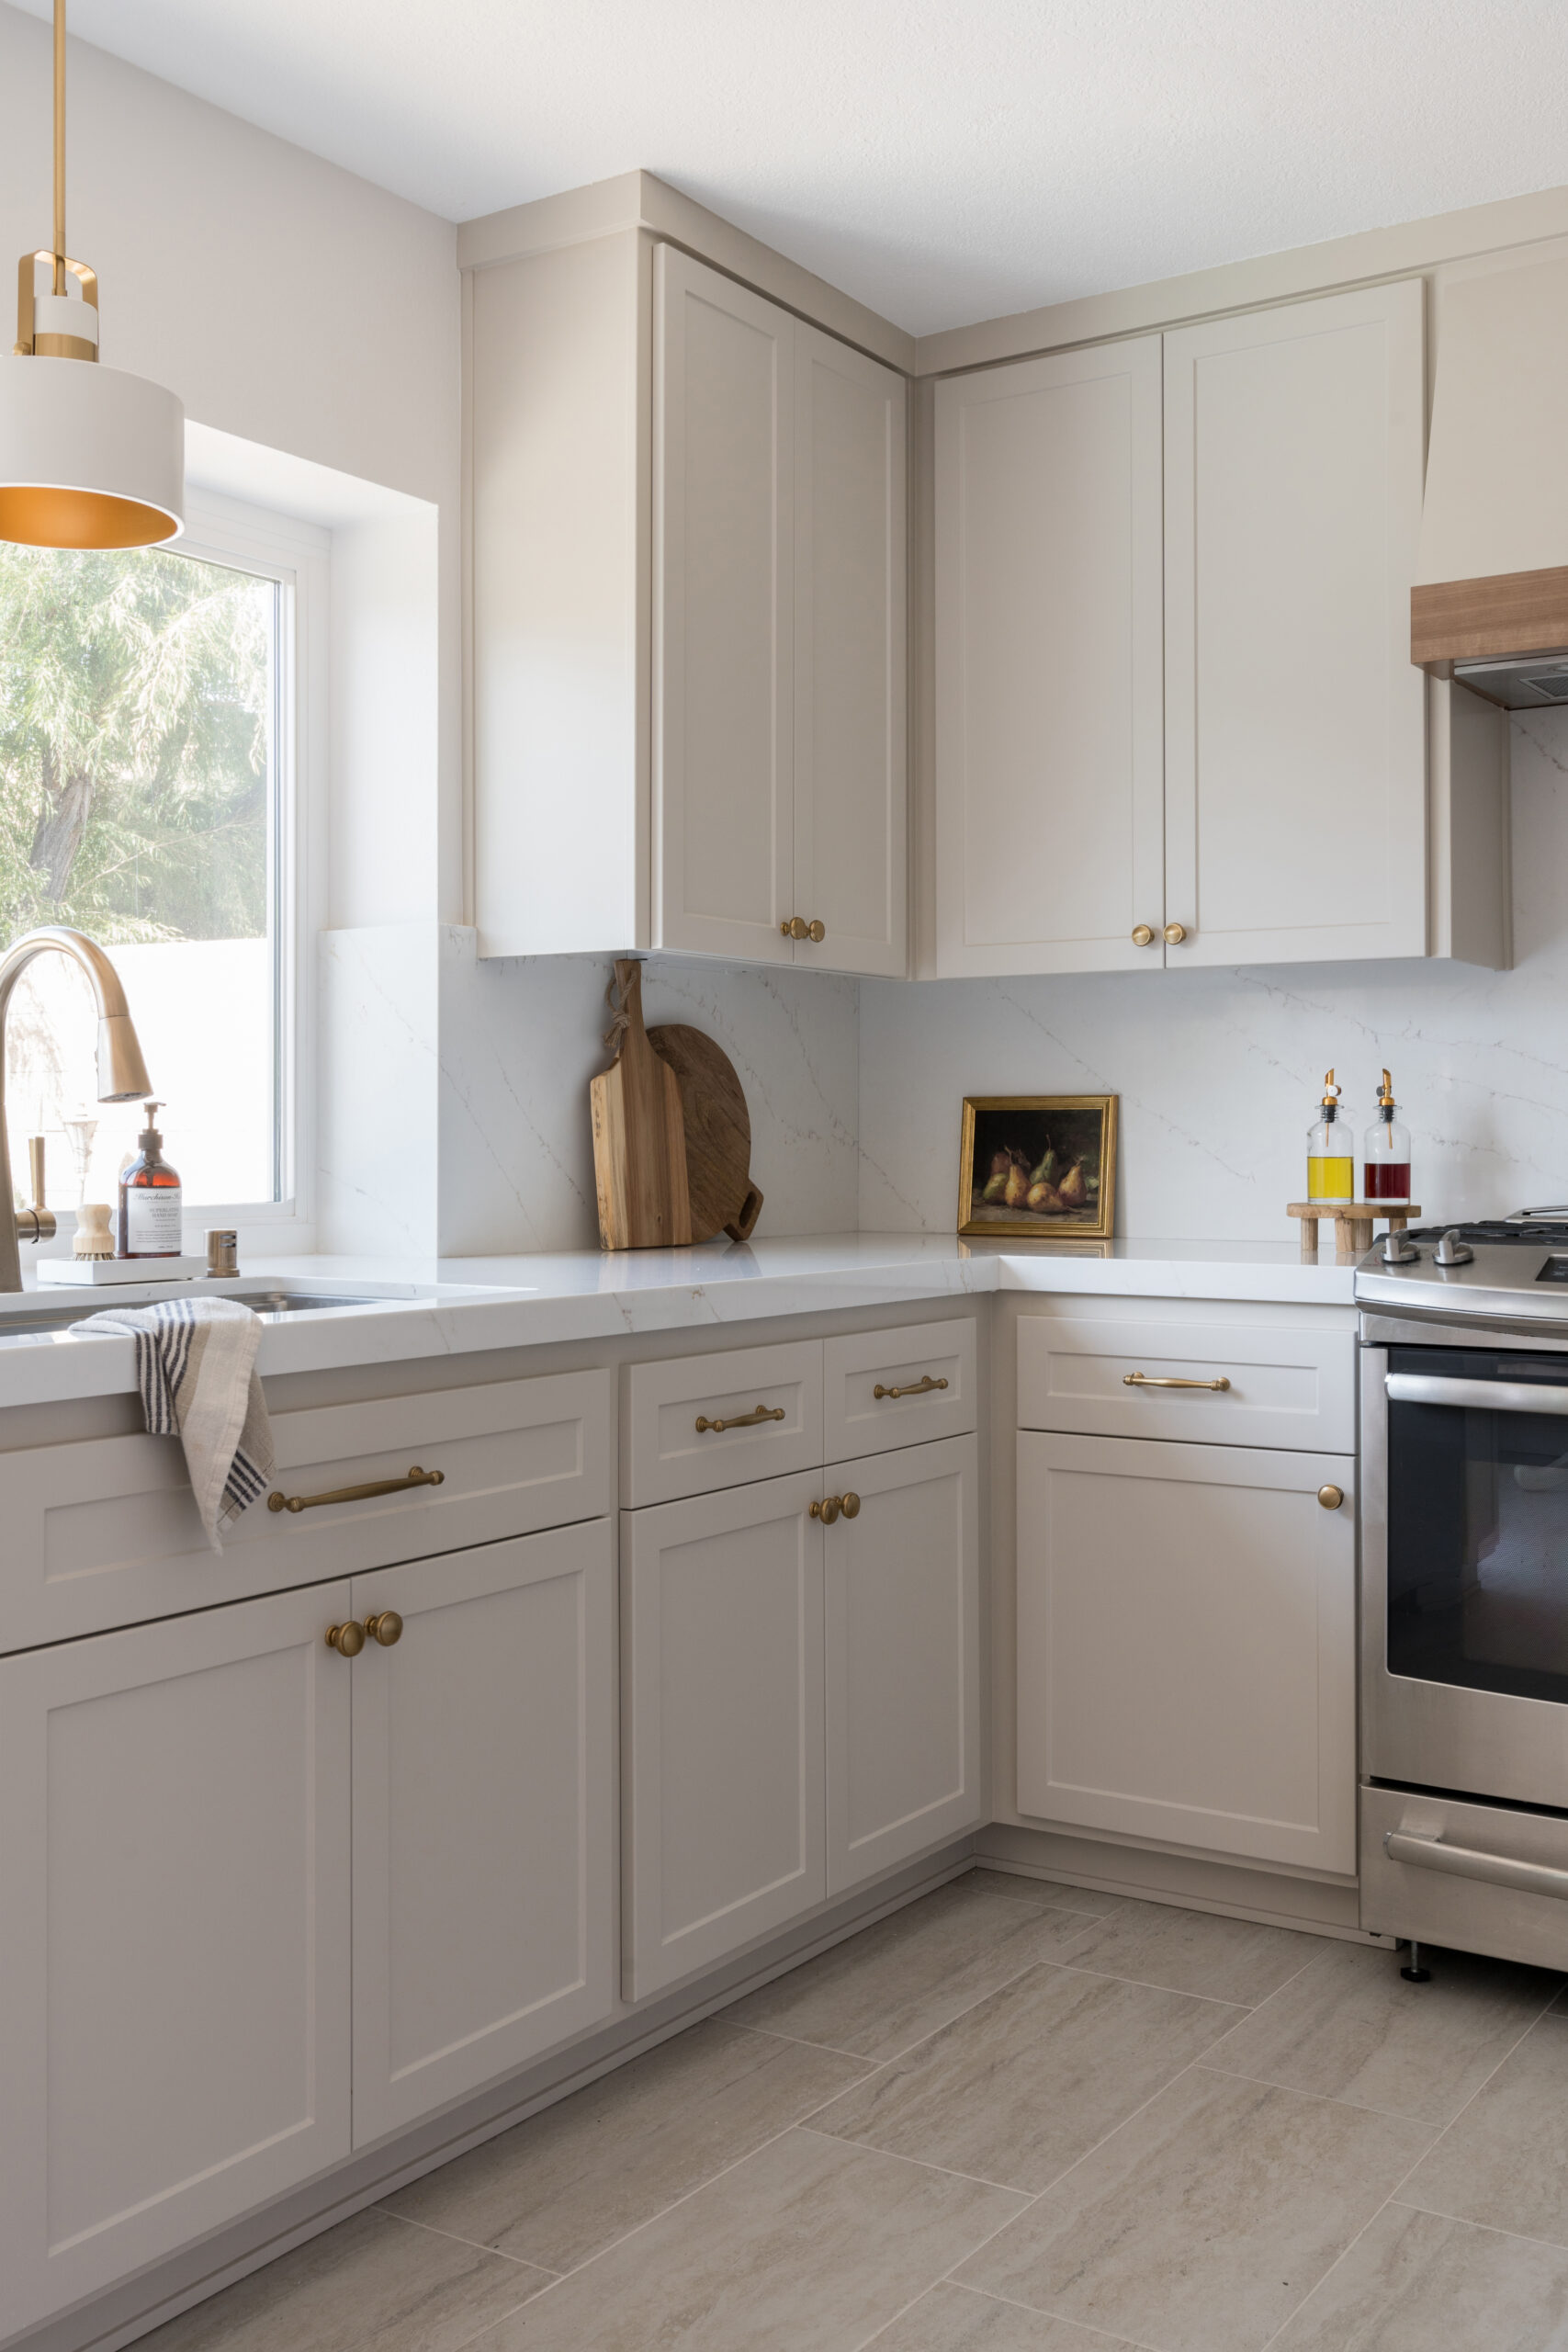
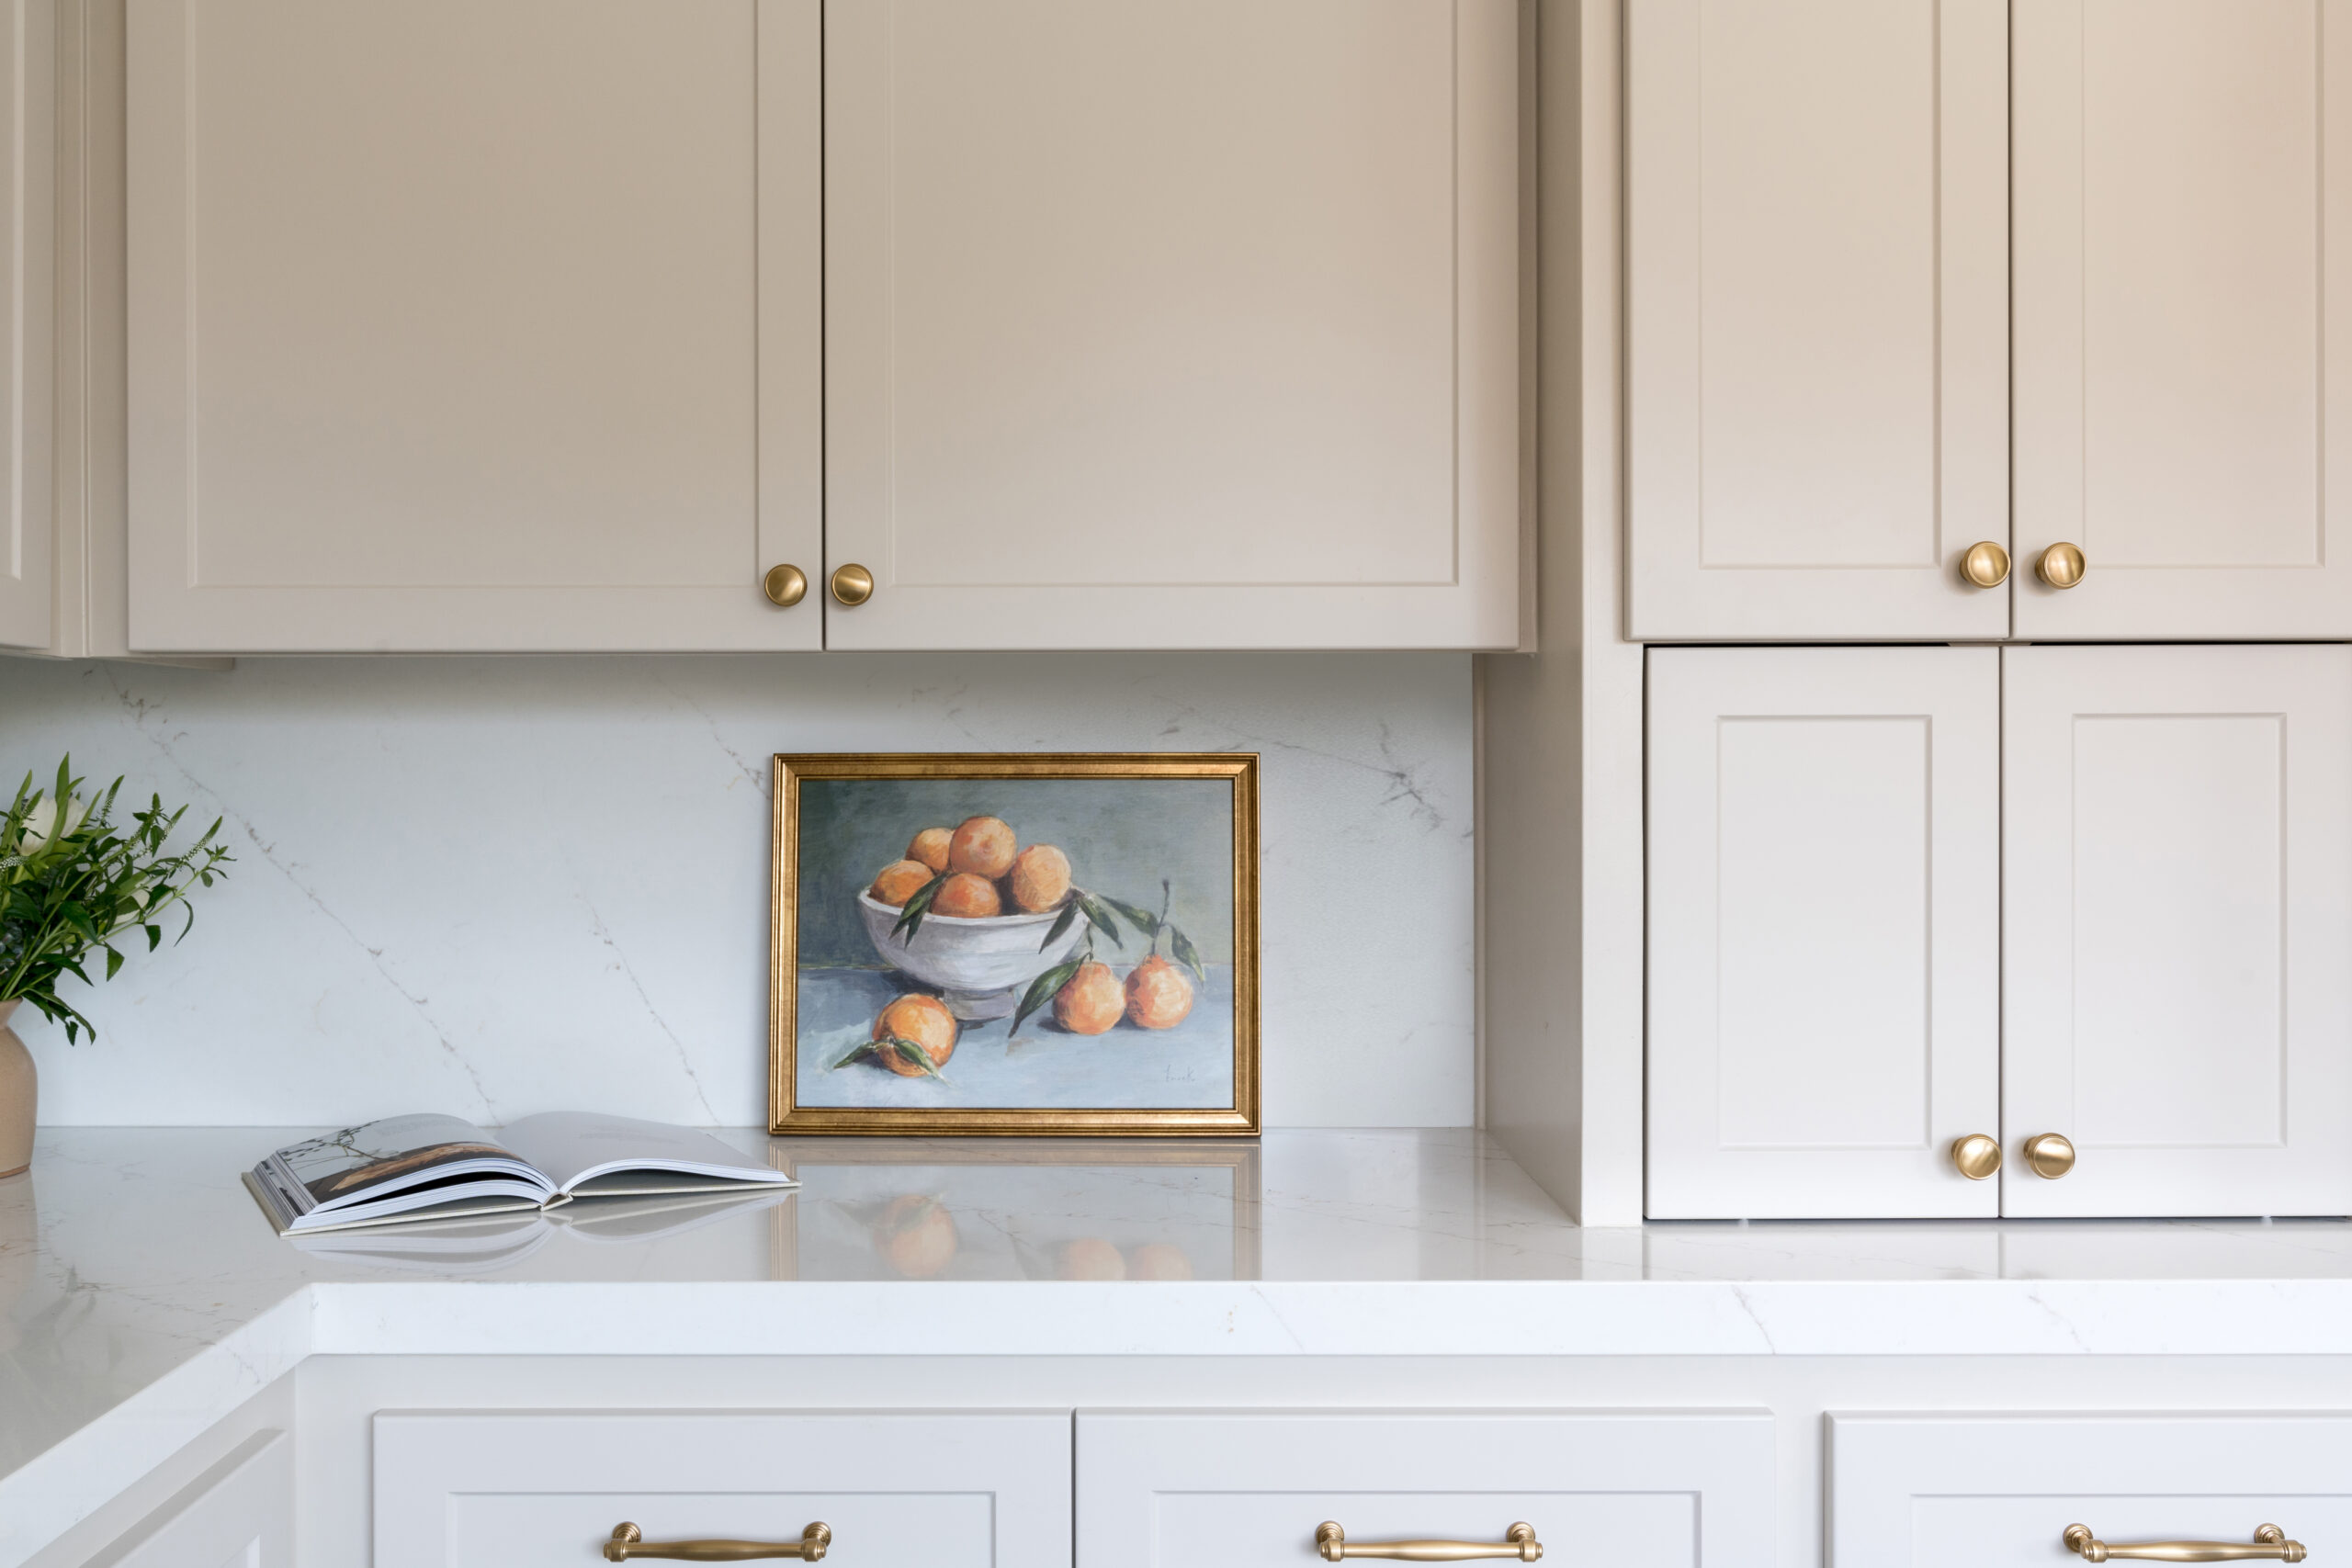
The addition of the appliance garage creates the cutest moment in this kitchen corner, but also added a lot of functionality to the space. It created a space for more storage and a place for the microwave.
I’d love to know what your favorite part of this project is! If you’re interested in working to together to design your dream space, check out our Services page.
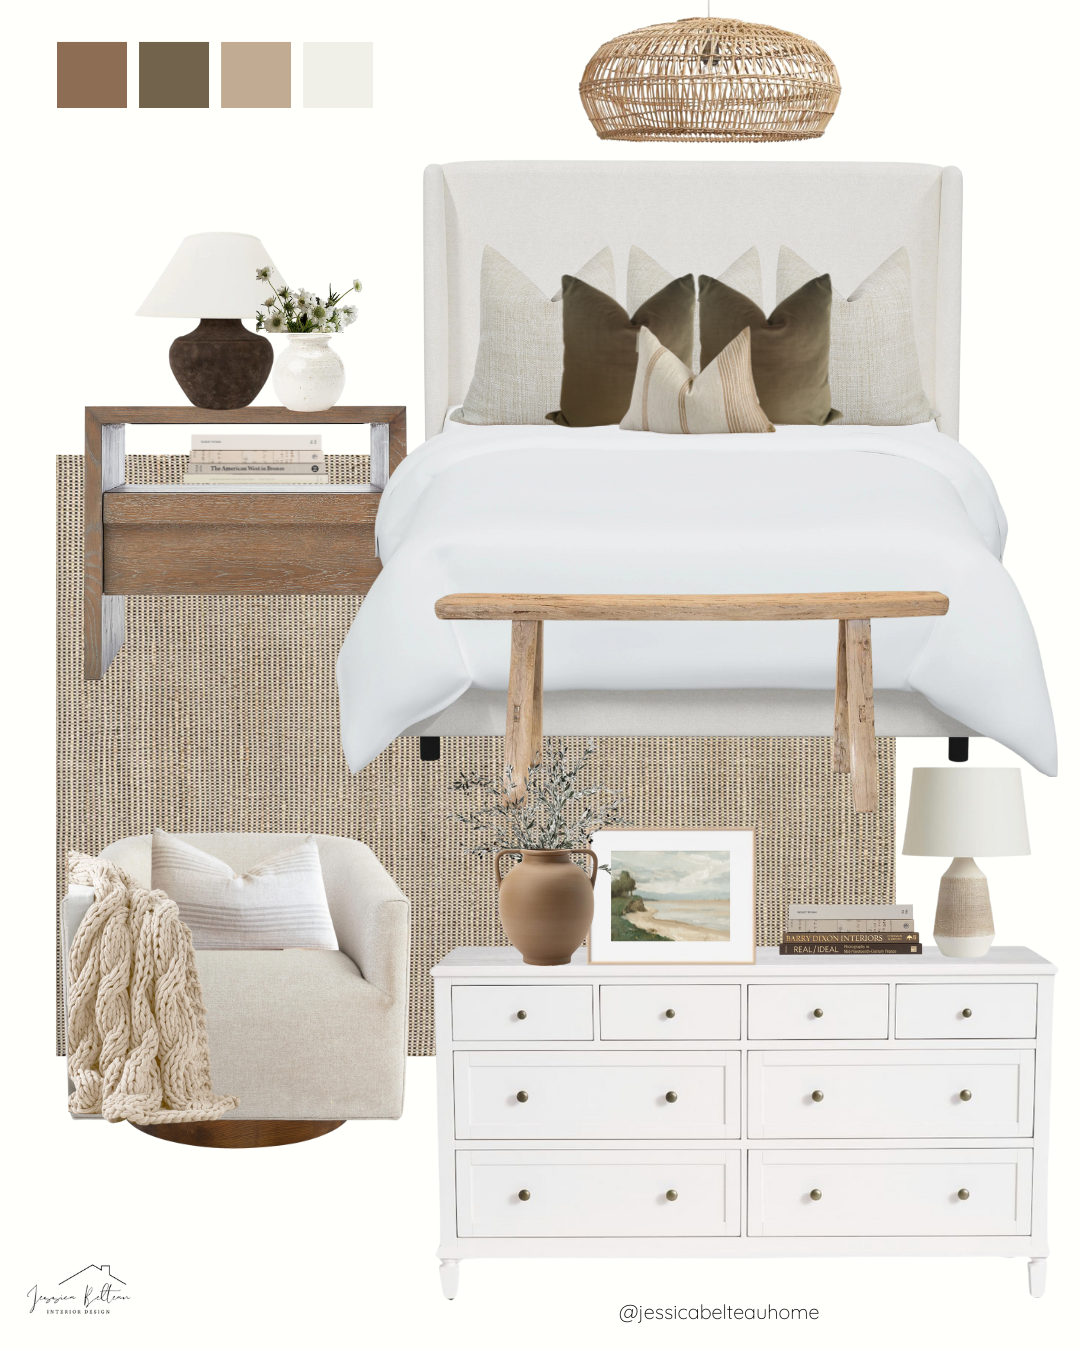
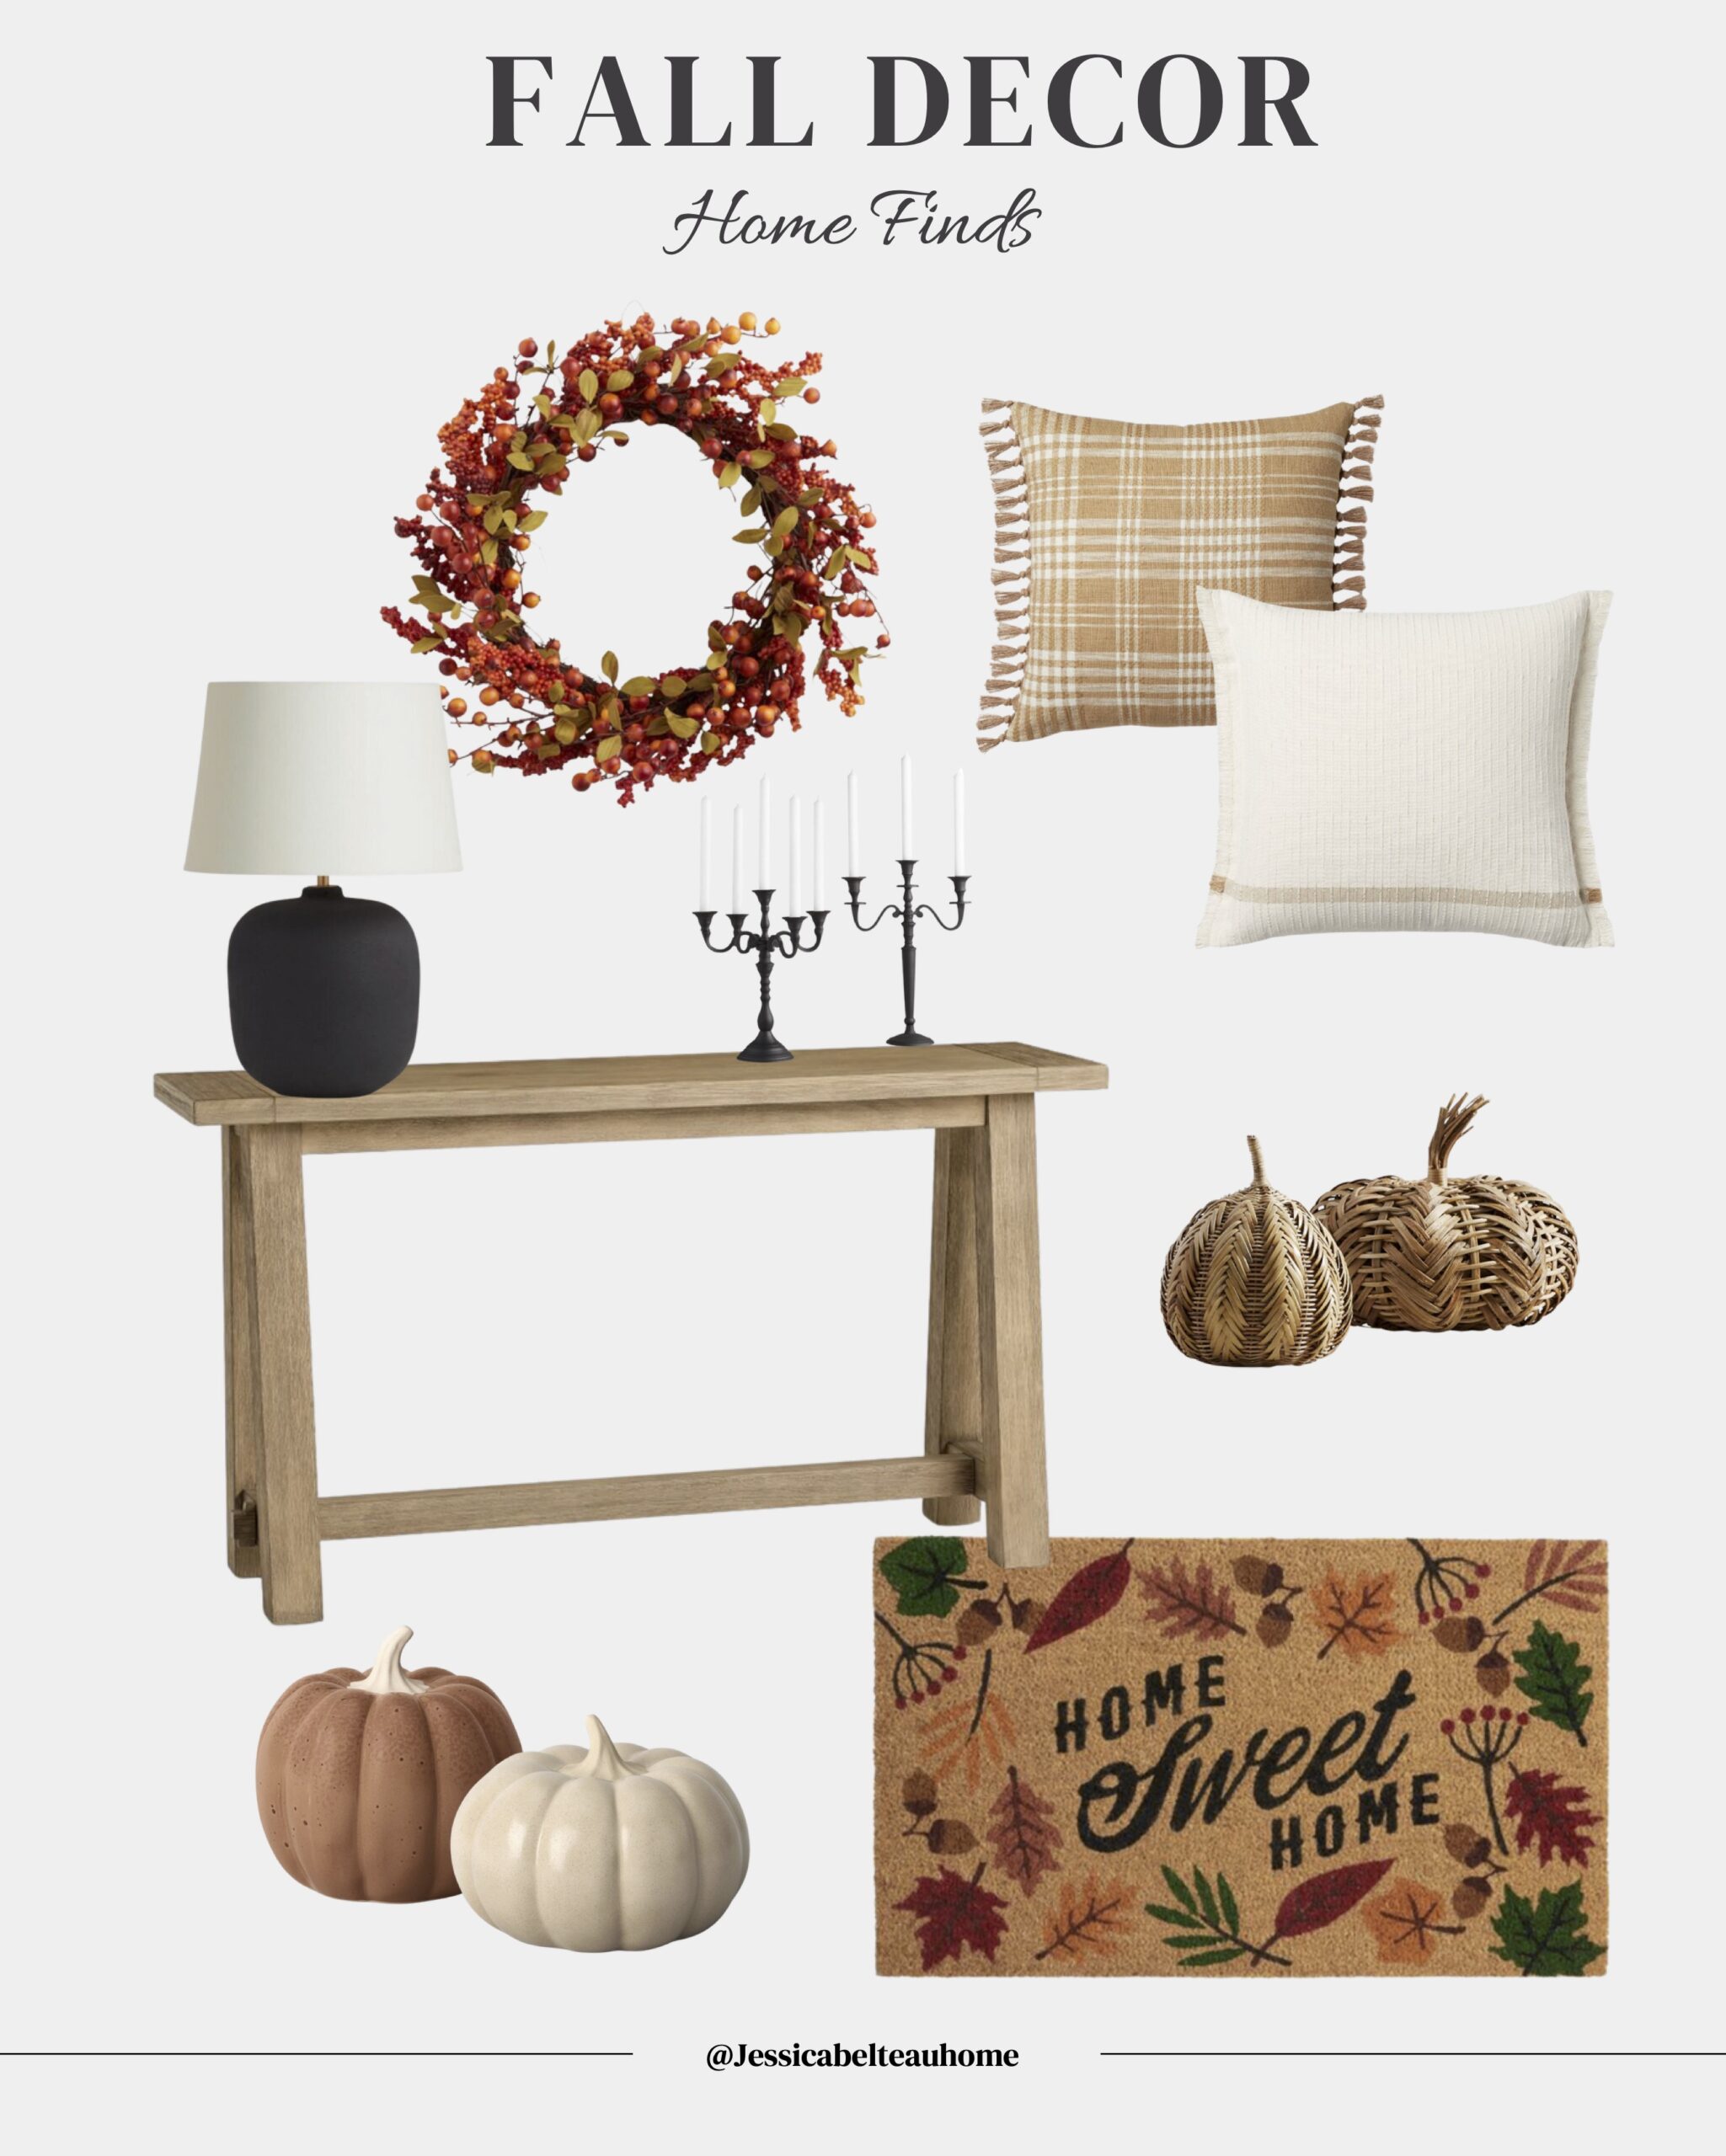
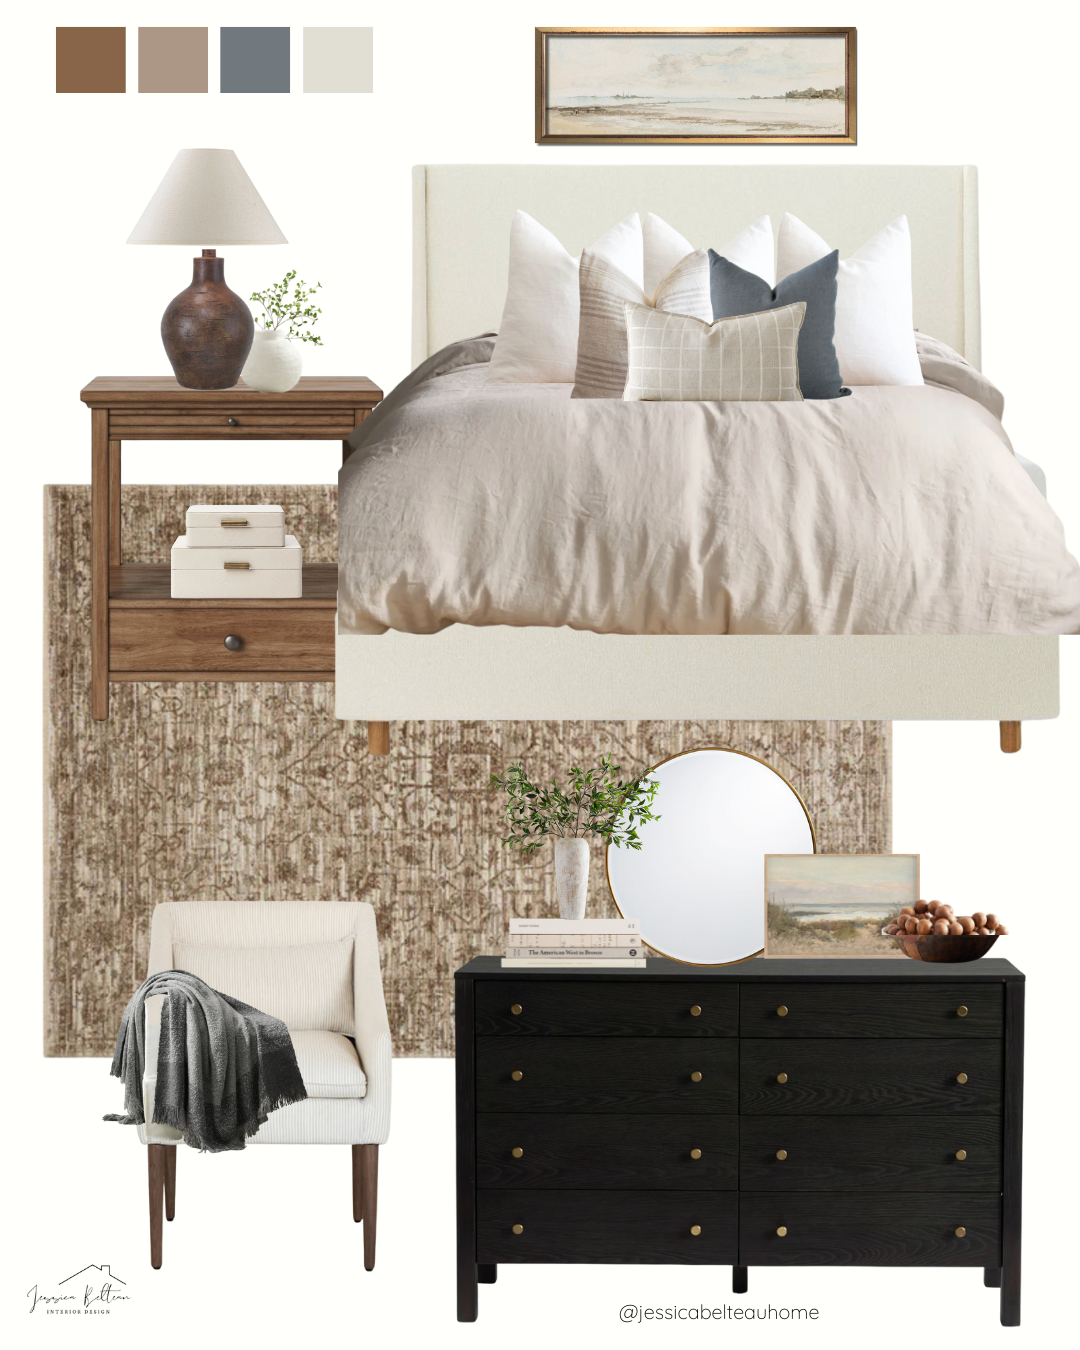
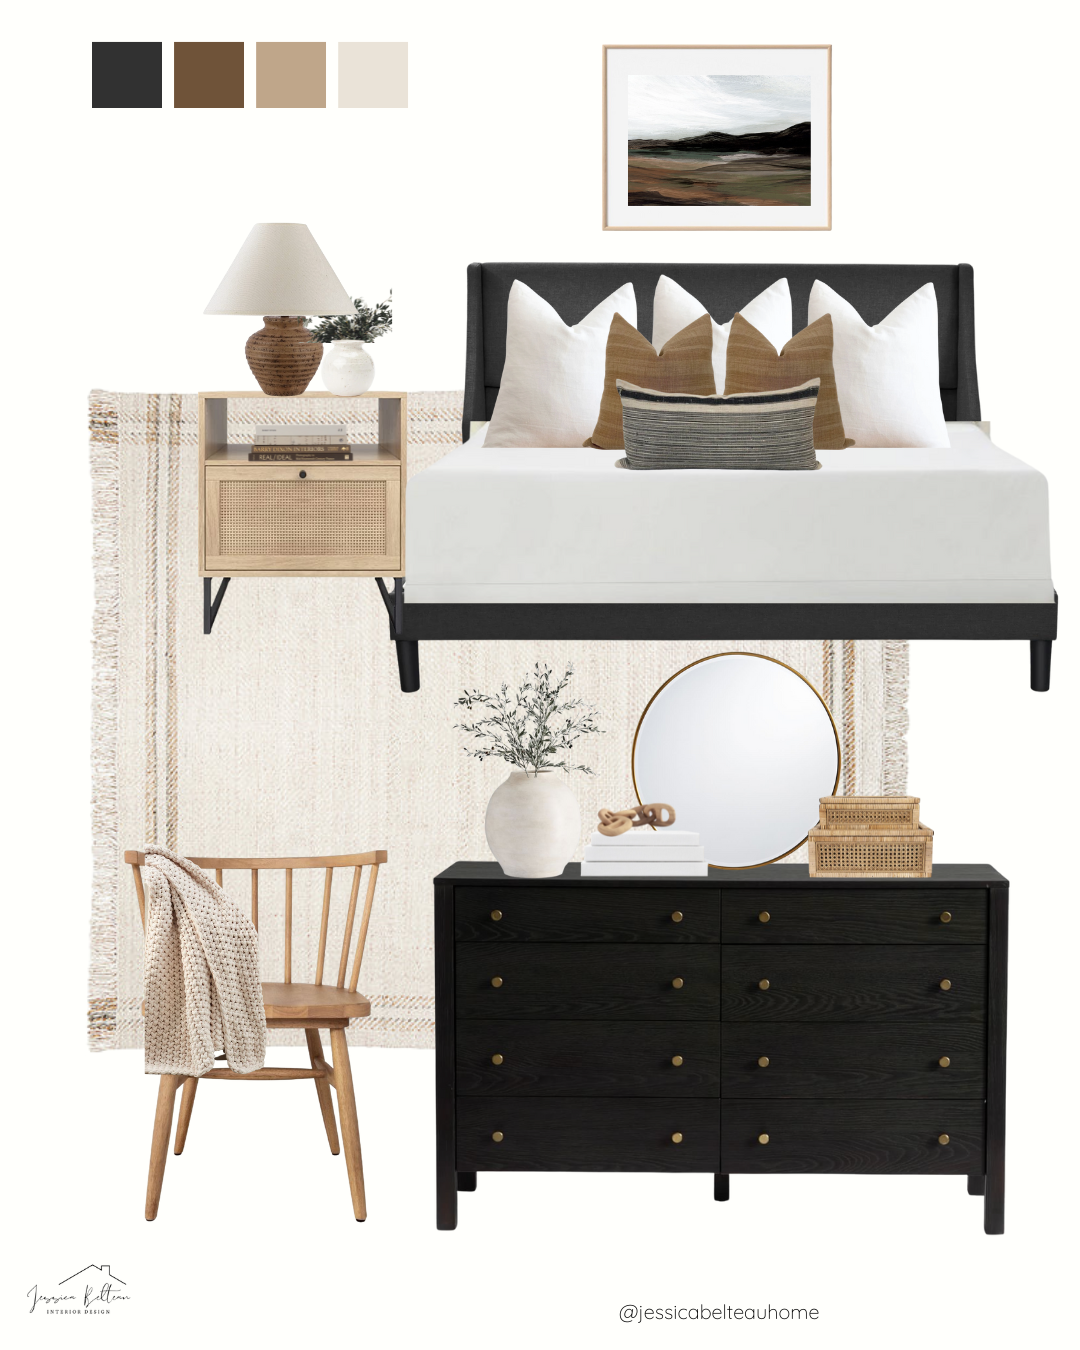
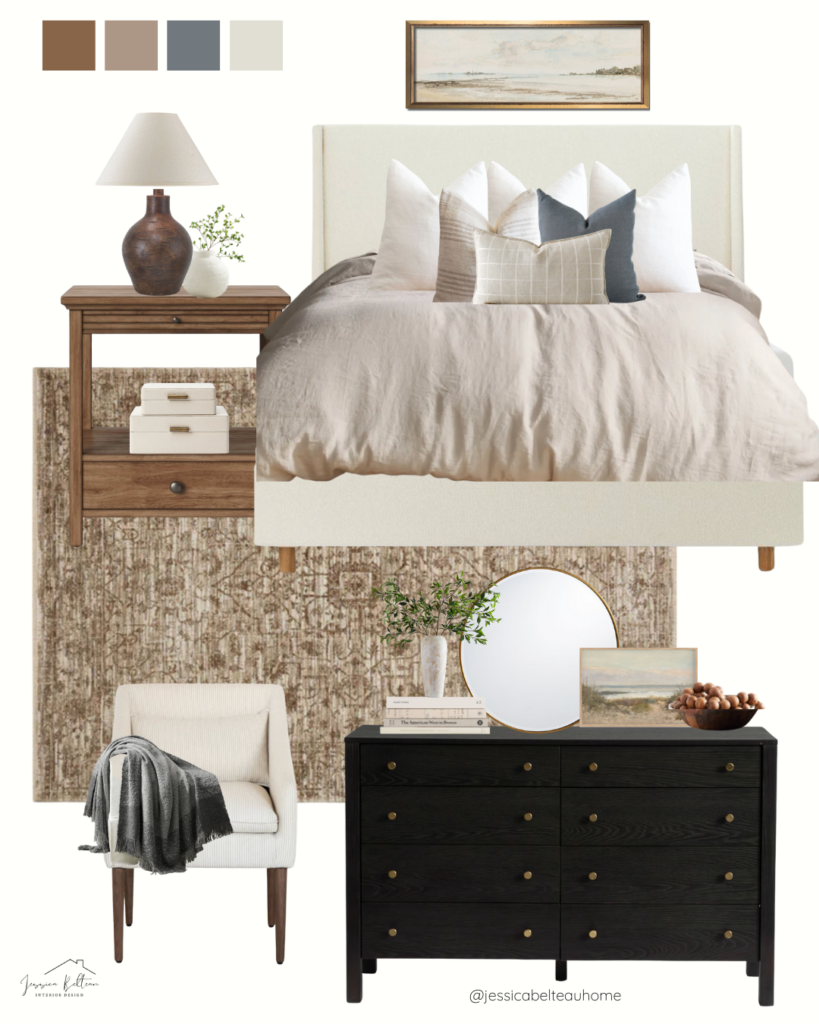
I’m excited to share some featured collections I’ve been working on for bedroom design and decor ideas!
Bedrooms are some of my favorite spaces to design! Each bedroom collection has been thoughtfully curated and I hope they will inspire you in designing your home. You can shop each design below and by visiting our LTK Shop.
If you’re interested in working together to create a custom design for your home, I’d love to connect with you. Please visit the ‘Services’ Page and submit a Design Inquiry. I look forward to learning more about your project!

*Please note that we may receive a small commission if you make a purchase after clicking on the affiliate links. These commissions help support the blog and our small business.


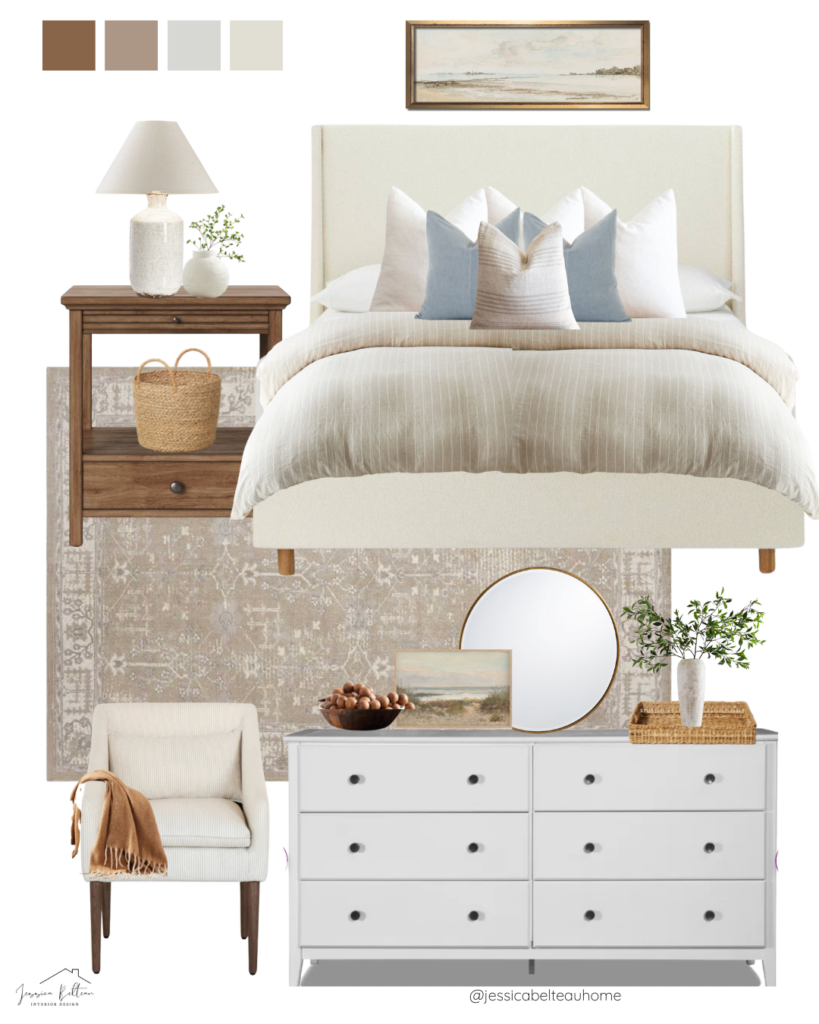
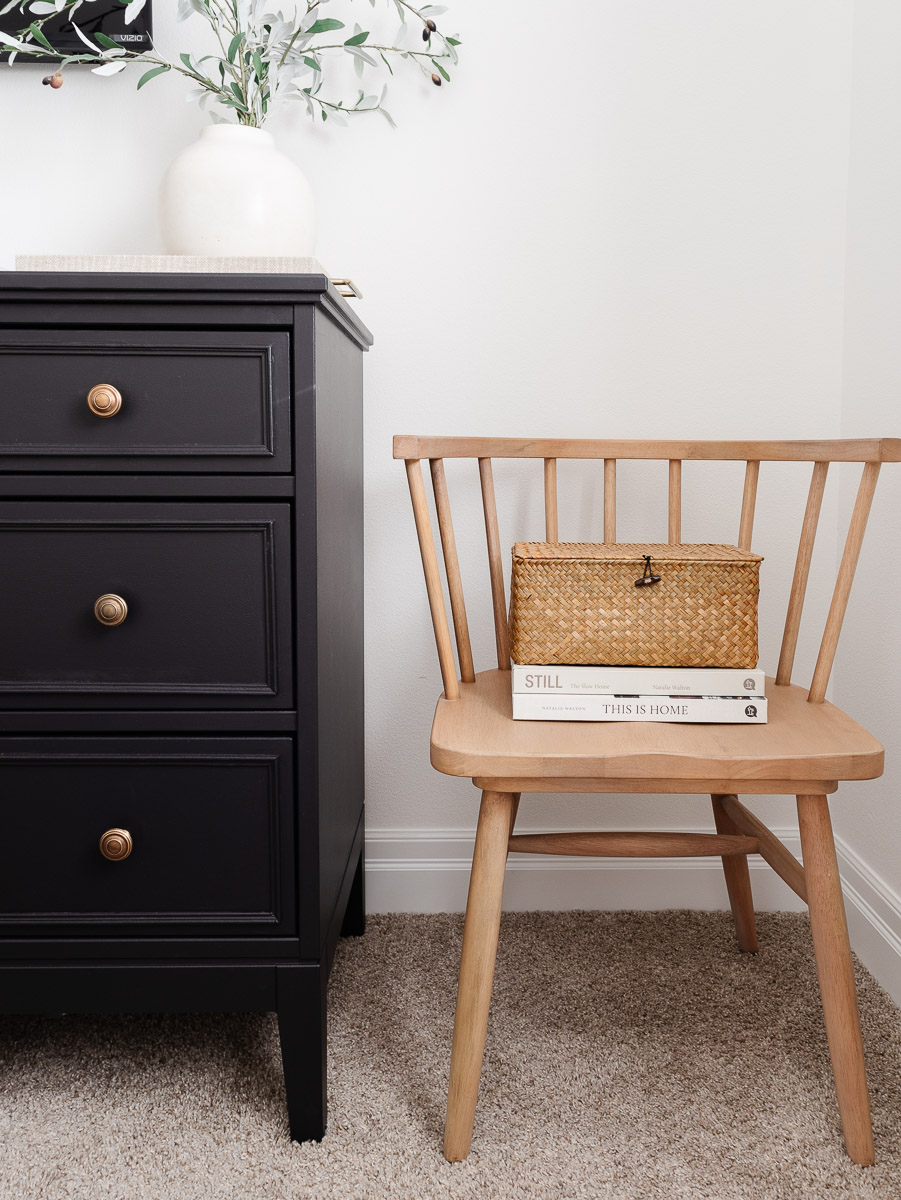
Also, check out my blog post on nightstand styling tips!

Do you struggle to decorate your bathroom? This post is for you, friend!
If you’ve been following me for a while, you know that I was working on a powder room remodel a few months ago. We’ve since then sold our house, so I hadn’t gotten around to revealing the transformed space. I still wanted to share it with you & this post felt like the perfect place to do it!
The key to decorating your bathroom is to keep it simple! I like to leave plenty of counter space open while adding just a few décor items to make it feel inviting. Keep reading for my best tips on decorating a bathroom!
- Replace your regular hand towels with Turkish hand towels
This might seem like a small change, but not only does it make a difference aesthetically, but also to the overall experience of using that bathroom. Turkish towels are much more delicate than regular towels and softer on the skin. A bonus, they also come in fun patterns that can add a designer look to your bathroom!
- Use a pretty diffuser
I like to place the diffuser on the back of the toilet or on shelving if the bathroom has it. I usually select a diffuser that doesn’t have an overpowering smell, but just something that adds a light fragrance to the room. Not only will your bathroom look pretty, but it’ll smell good too!
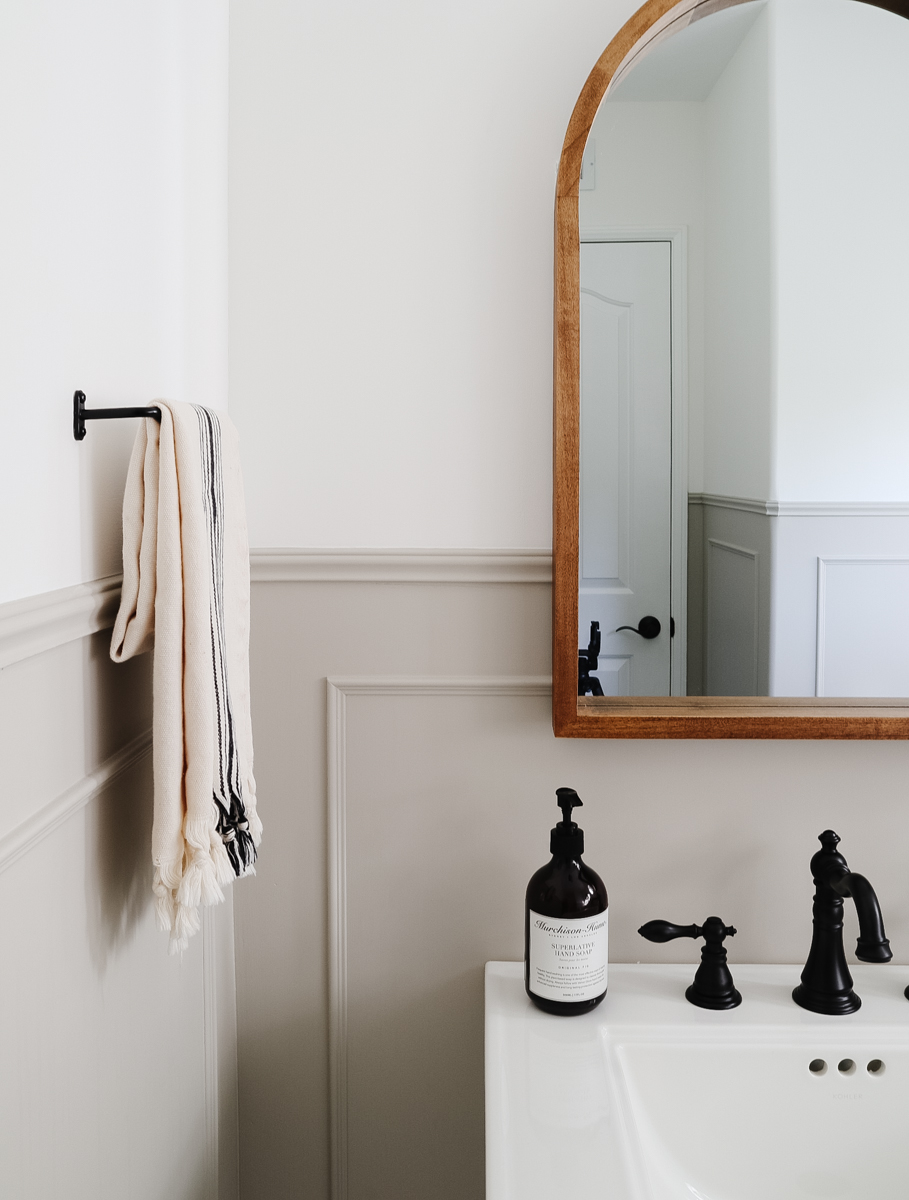
- Swap out your hardware (towel bar & toilet paper holder)
This is an inexpensive way to give your bathroom a designer look. Bonus points if you can swap out the toilet handle to match the rest of the accessories!
- Add a pop of green
In my opinion, greenery can really soften the look of a bathroom. I personally prefer faux greenery, but fresh greenery would be a nice touch too! I make sure that the size of the vase and greenery is appropriate for the size of the vanity. For example, in a master bath with a large countertop area, I would opt for a taller arrangement. Whereas with a smaller sink, I would select a bud vase.
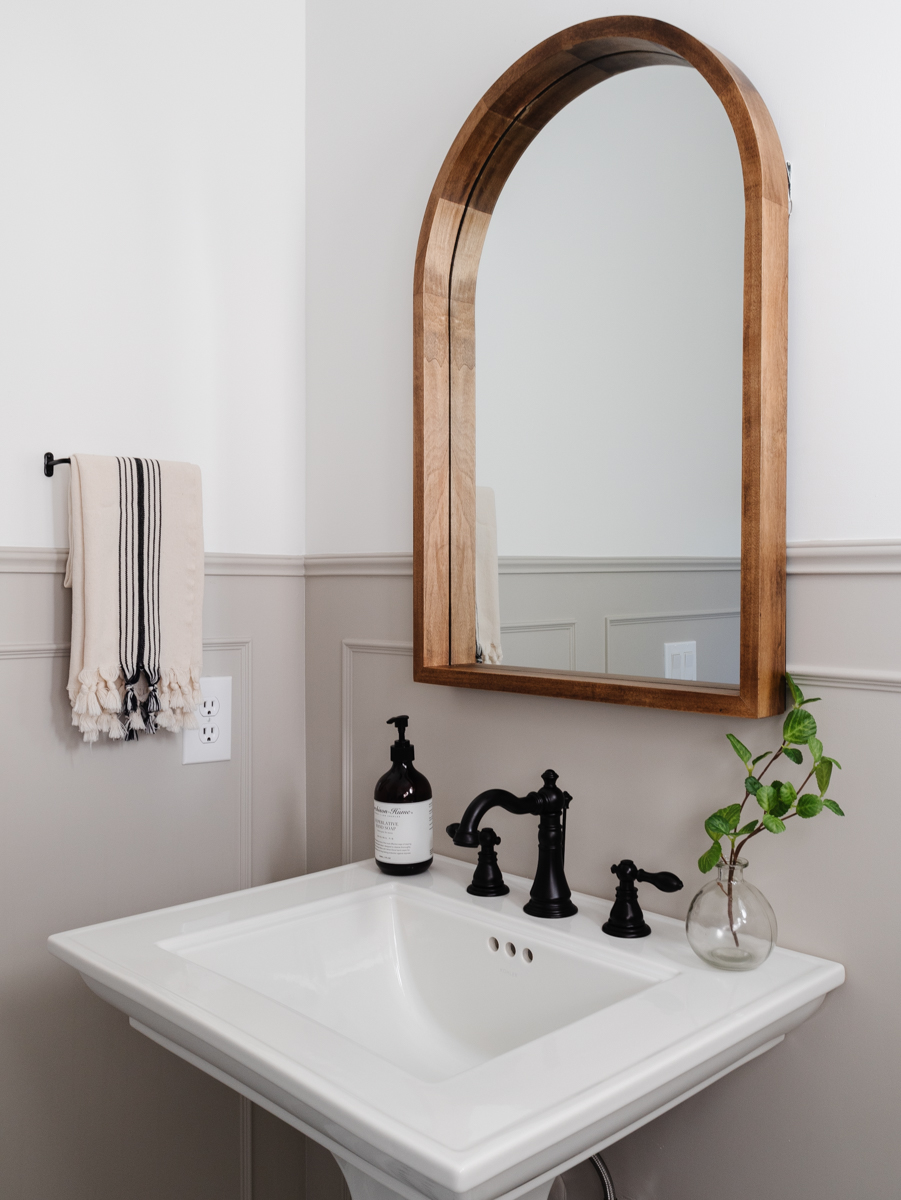
- Don’t forget the wall art!
I never used to put wall art in our bathrooms, but now I can’t do without it! My rule of thumb with wall art for bathrooms is to select a neutral piece. Another tip I like sharing is to match your frames with the accessories in the room. It will make the space feel cohesive!
As always, thanks for stopping by! Happy decorating.
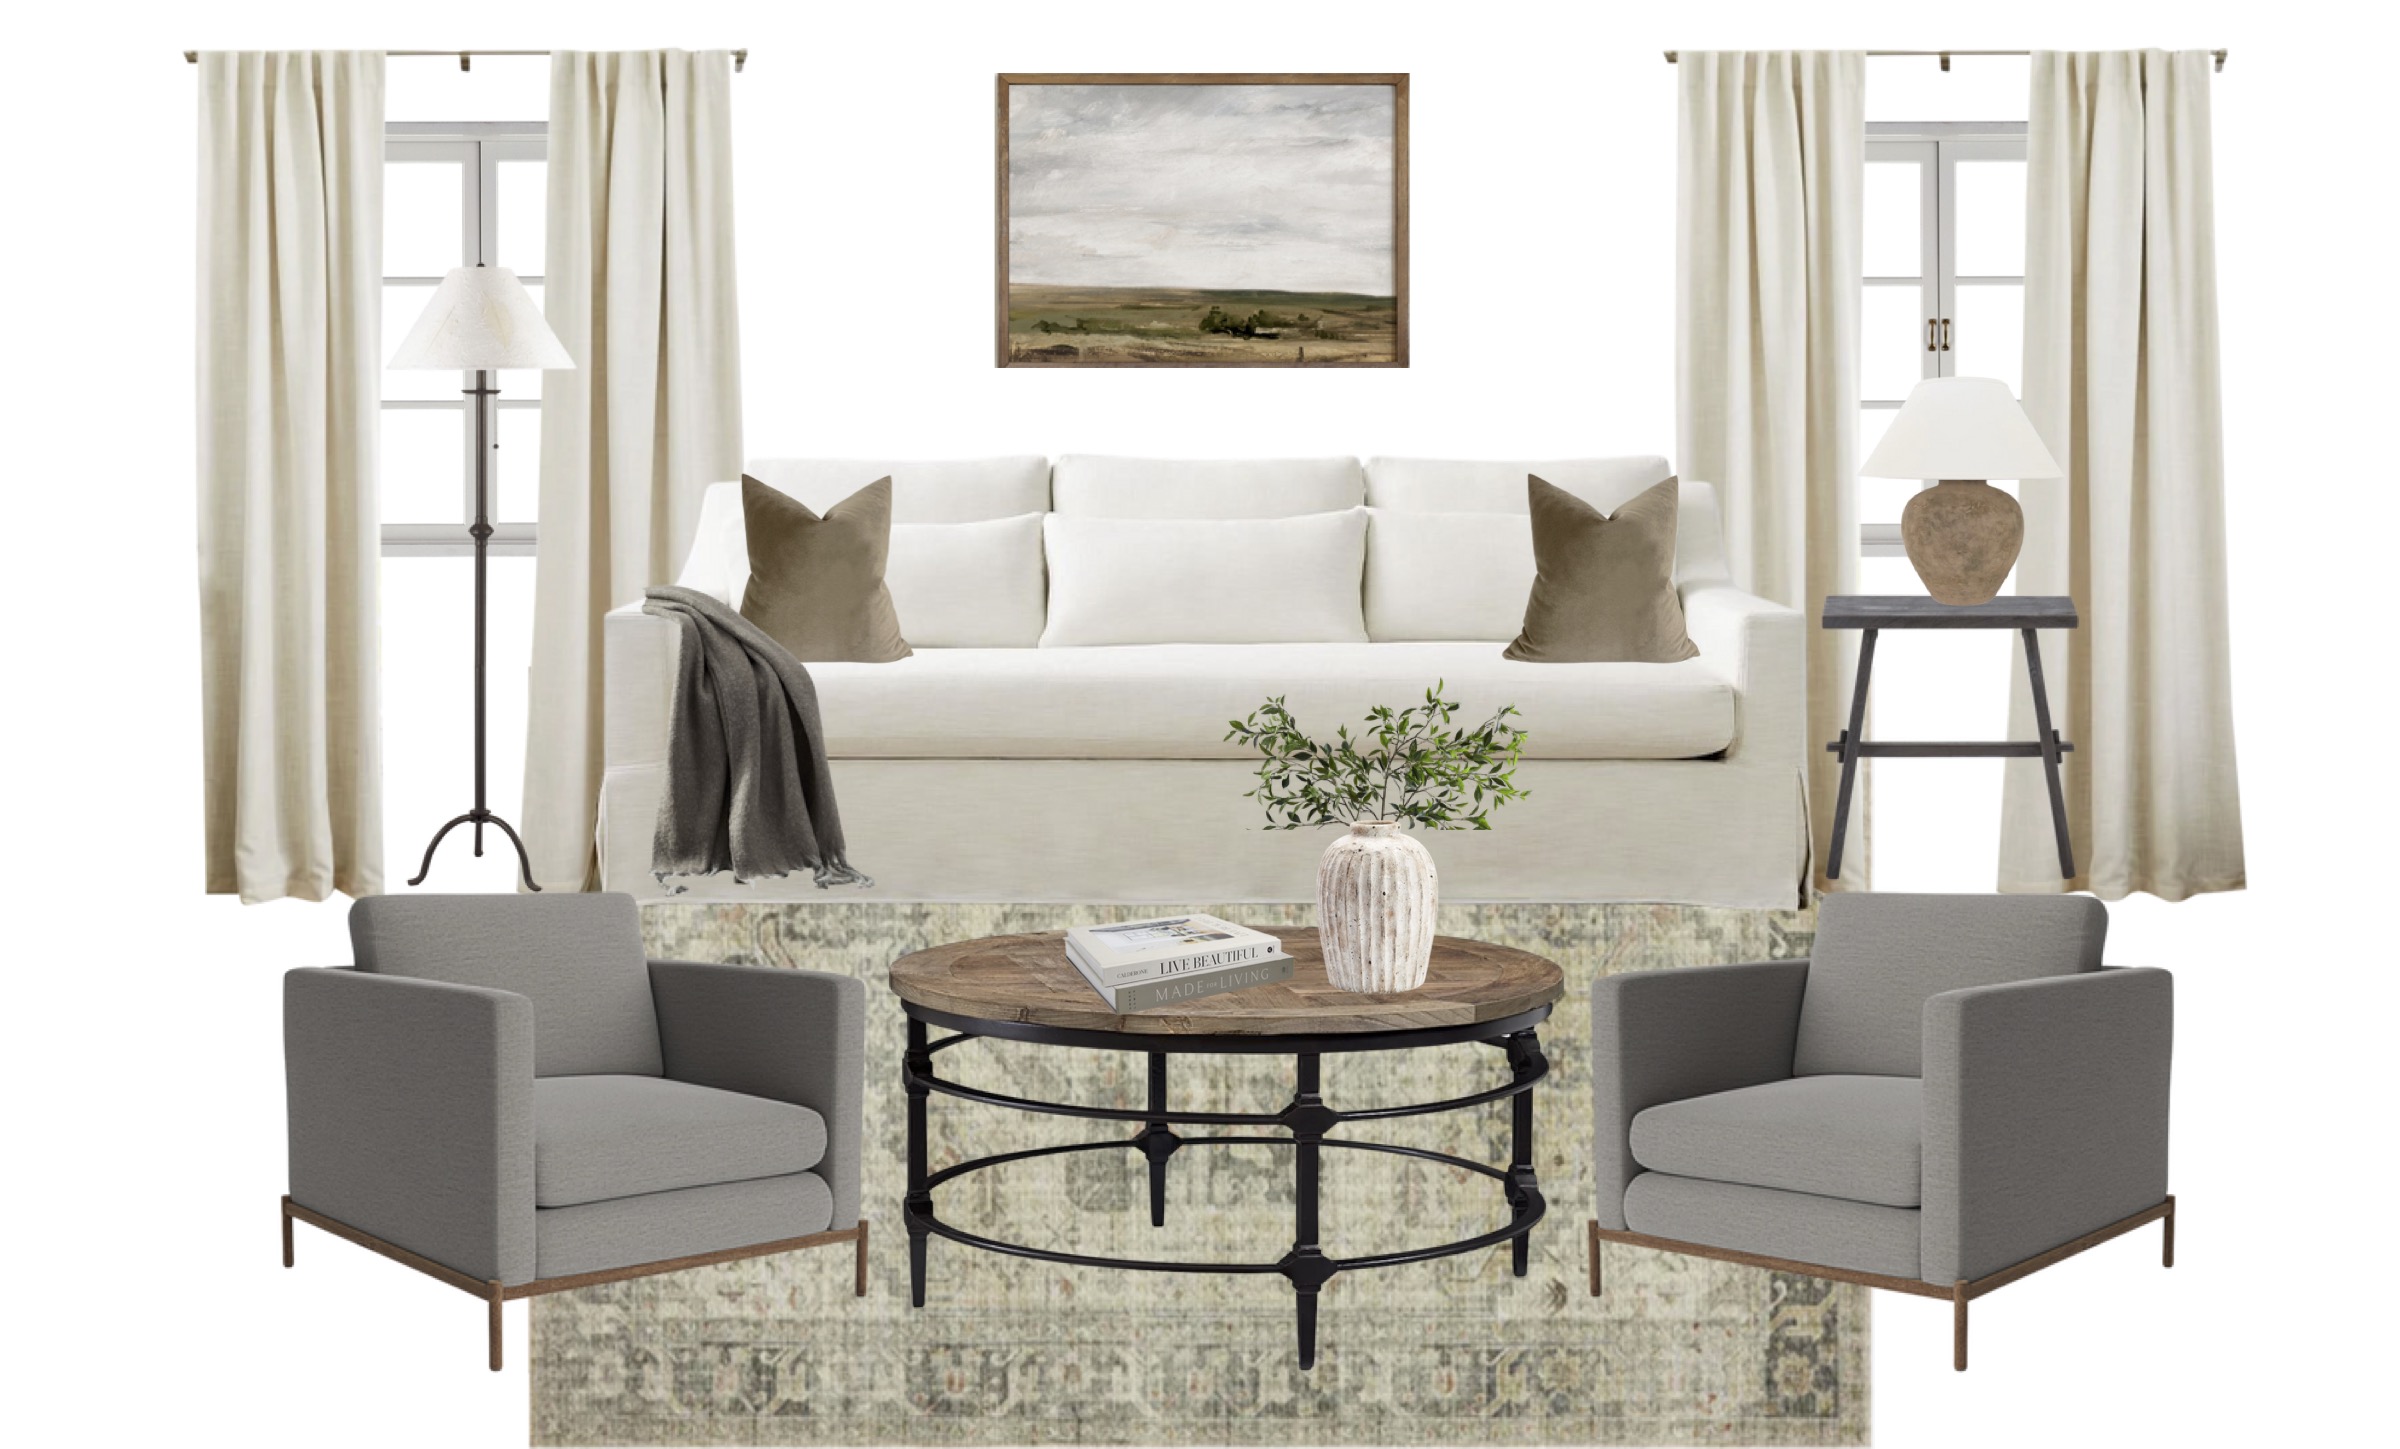
I’m so excited you’ve landed here because today, I’m officially launching my e-design services! This is something I’ve been considering doing for some time and really got the push when I had the honor of helping a friend design their living room earlier this year.
My passion for interior design began when we purchased our first home a few years ago. We did an extensive renovation, which was completed in a little over 2 years. I learned so much through this experience including how to source materials, how to use interior design software, and how to effectively coordinate and communicate with Contractors. My second passion is helping others, so to me, e-design is the perfect combination of both!
If you have a space that you need help designing, I’d love to connect with you. You can learn more about my services by visiting the Design Services Page.
I look forward to working with you!
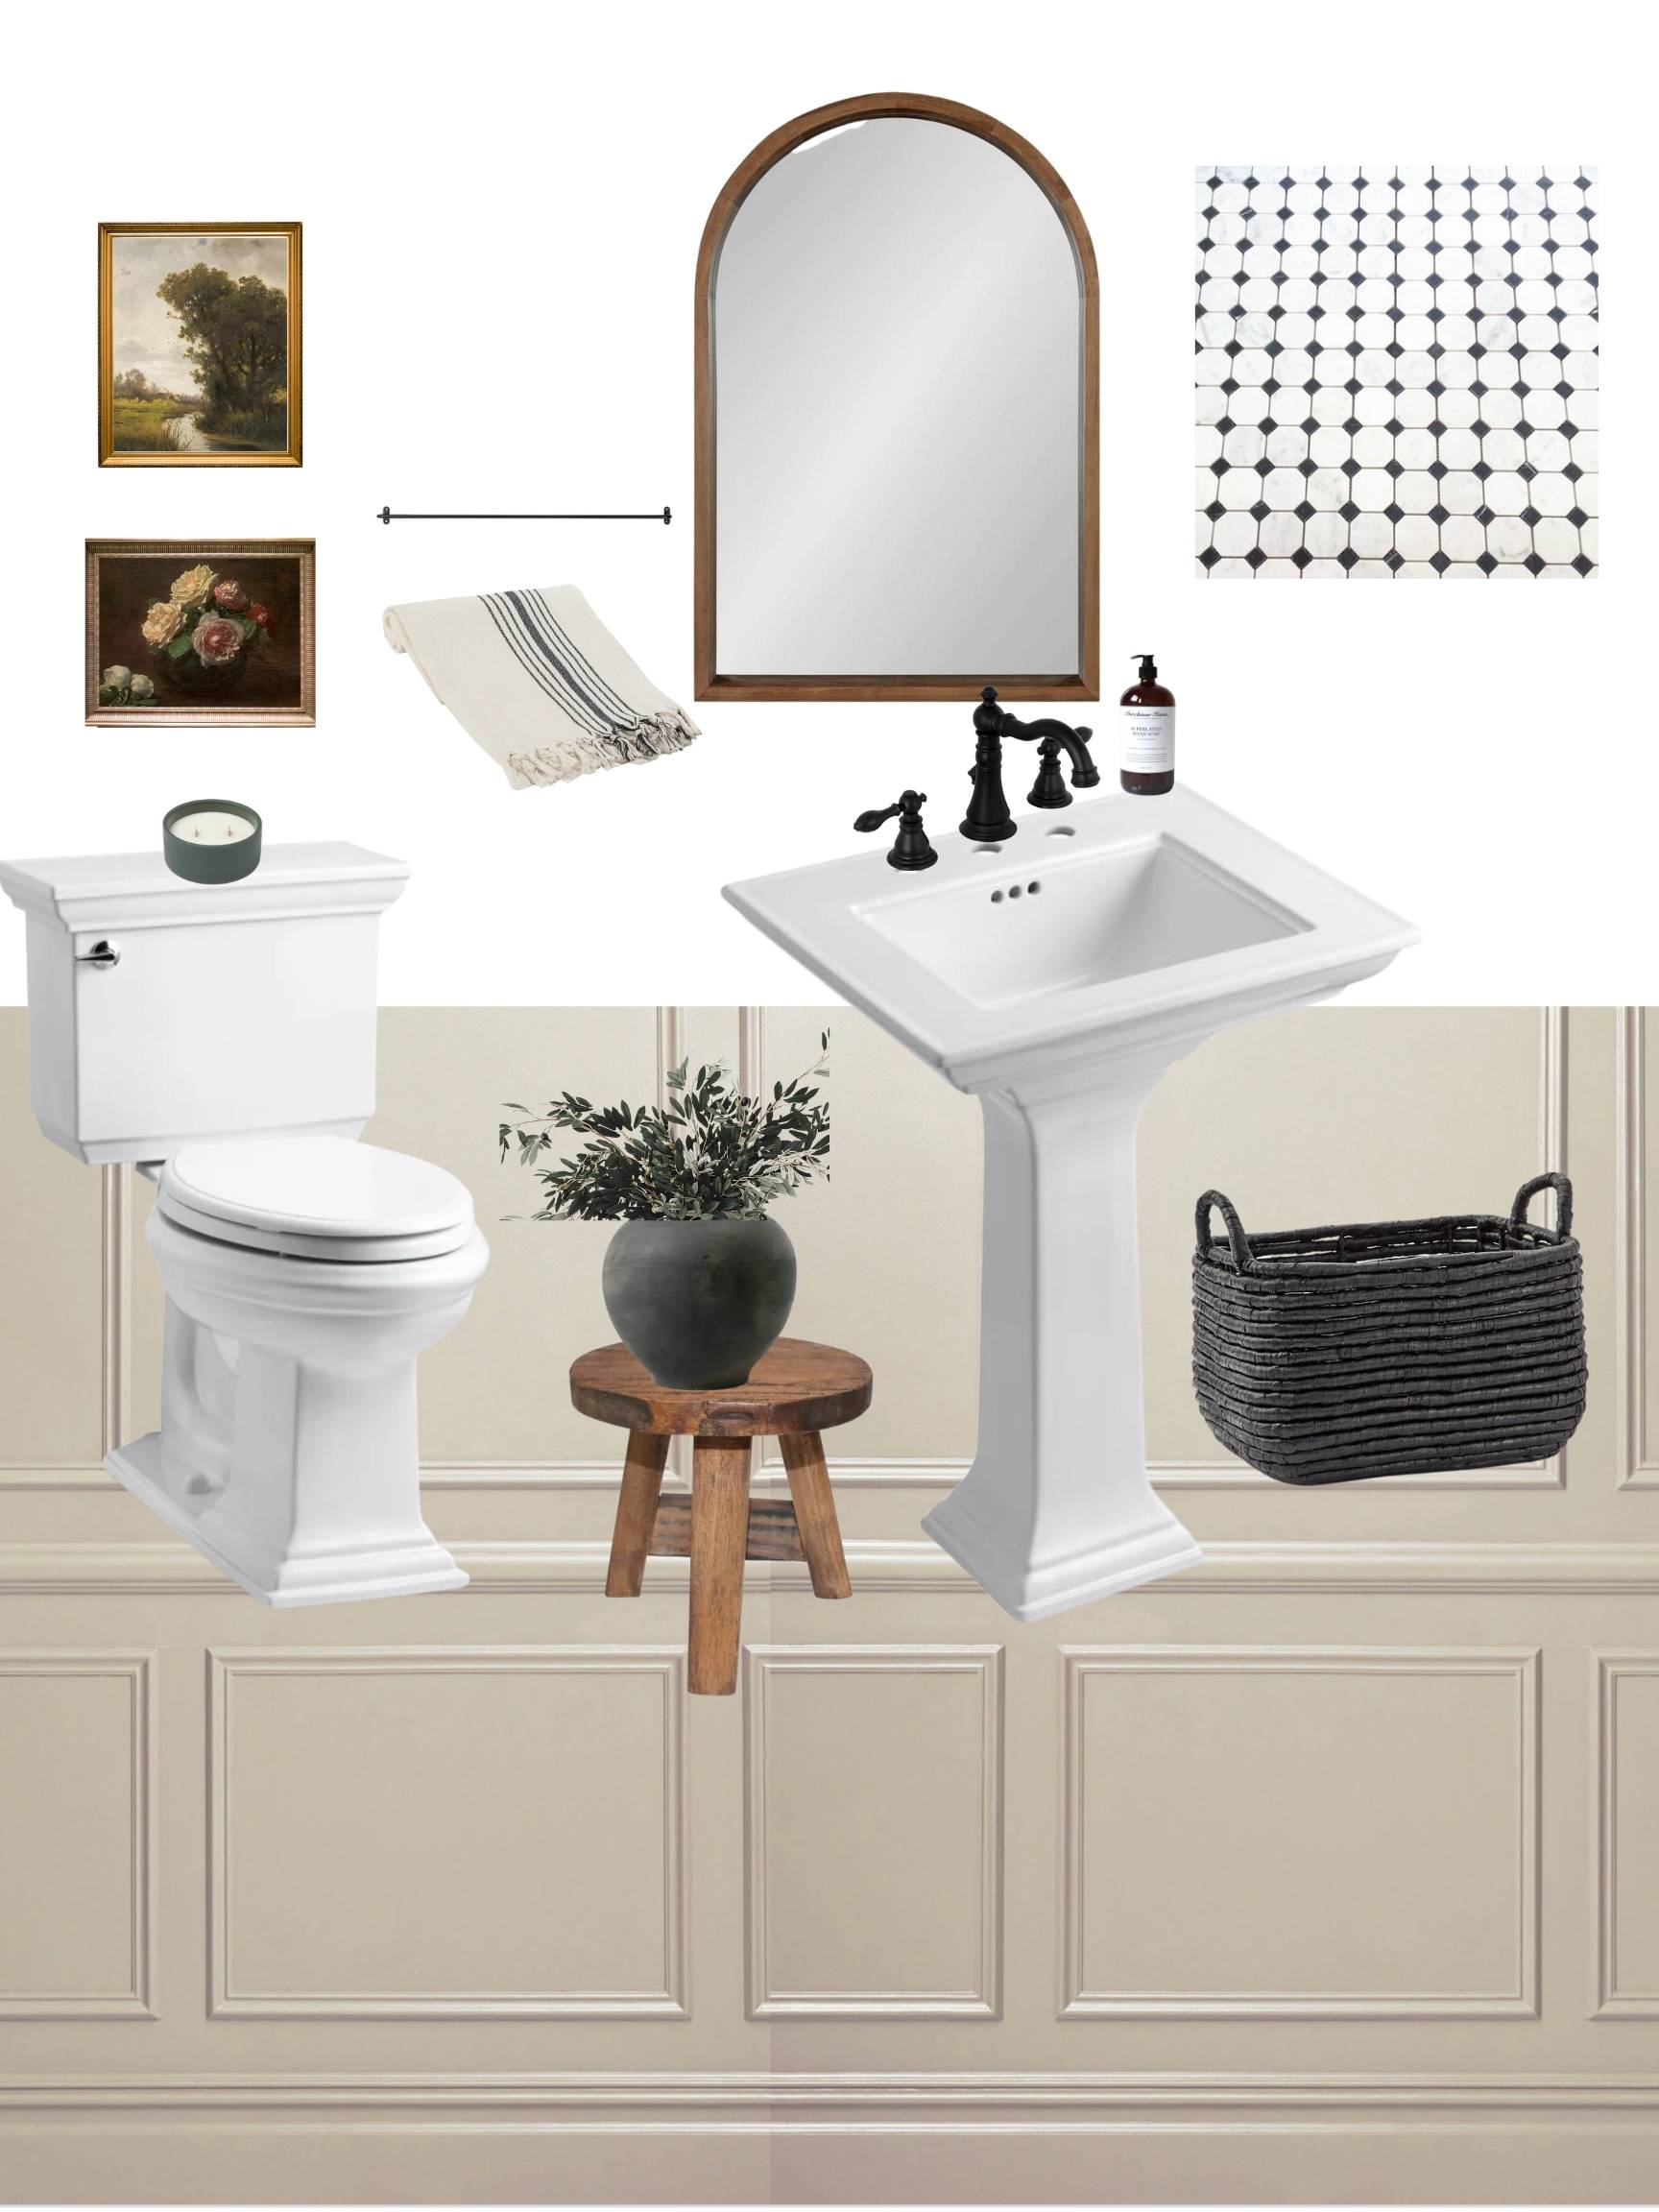
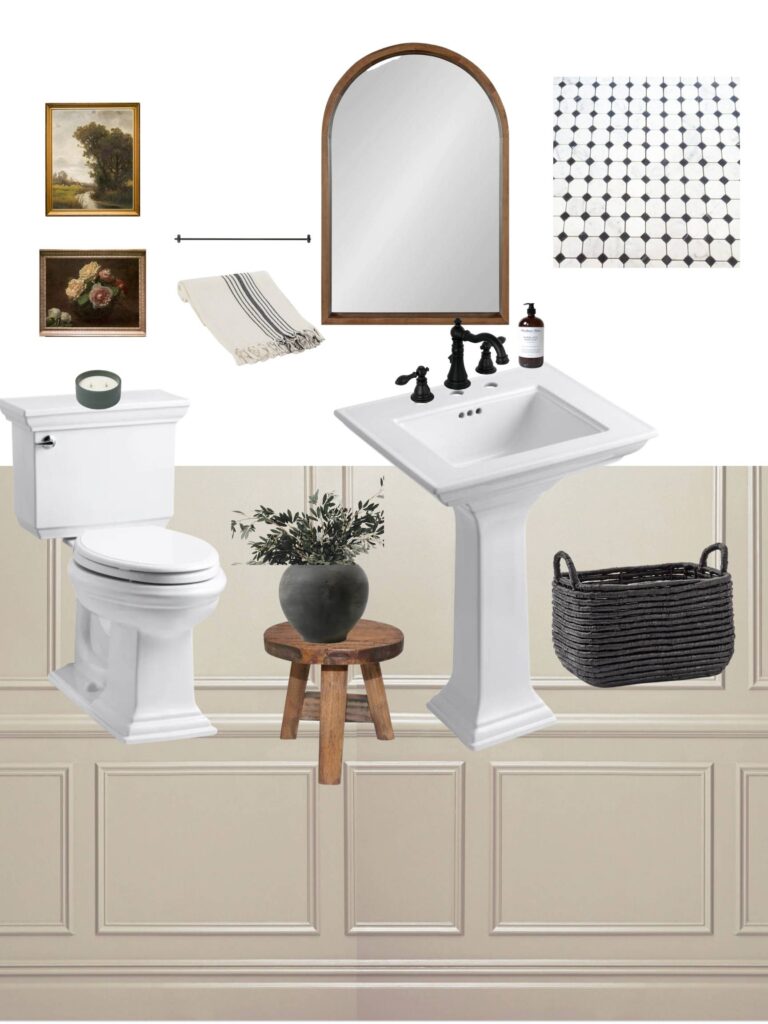
This week I shared that our powder room is getting a full remodel! We made some minor updates to this space when we first purchased our home, but it never felt complete. The room is an interesting shape, so for two years I’ve been trying to figure out what I wanted to do with it, and I’ve finally nailed down the design!
I thought it would be fun to share my plans for the space along with the sources to everything I’ll be using. I’ve also included links to some free art prints that you can use in your home (Scroll to the bottom for the links).
Click here to see what the powder room currently looks like & looked like when we first moved in.
My To Do List:
- Demo the bathroom
I’m replacing everything except for the toilet…maybe. Once I remove the toilet, I’m going to measure for a new one and if there’s enough space, I’ll order the one I really want! In addition, I’ll be removing the old pedestal sink along with the faucet, taking down the mirror, removing old hardware and taking up the tile floors. Phew! That’s just the demo.
- Smooth the walls and install trim
The walls in the powder room have some heavy texture that was necessary after we removed the old wallpaper. Since I’m going to be adding box trim, I will need to smooth out the walls. This will be my first time doing this, so wish me luck!
- Install new tile floors
I’ve decided on a Carrara White Marble Mosaic Tile with Nero Marquina Black Dots. This tile is absolutely stunning! This was a bit of a risky decision because the pattern can look a little busy, but I think it’s exactly what this space needs.
- Paint
I’m still deciding on paint color for the trim, but the walls will basically be two colors. One color up to the trim (this will be white) and then a different color from the trim down. I’m debating between a greige or dark green. I’m going for a timeless look, so I think either will look great.
- Install toilet, faucet, mirror, new towel bar, and toilet
Finally, it will be time to put it all back together. Installation of these items should be relatively easy, so I anticipate this shouldn’t take too long.
I’m so excited to share the finished project with you all! Below are sources to all the items I will be using.
Sources (These are clickable links):
- Paint Color: Flatiron by Clare Paint
- Free Art – 1 & 2
- Pedestal Sink
- Faucet
- Toilet
- Mirror
- Tile Floors
- Black Basket
- Wooden Stool
- Black Pot
- Green Stems
- Towel Bar
- Towel

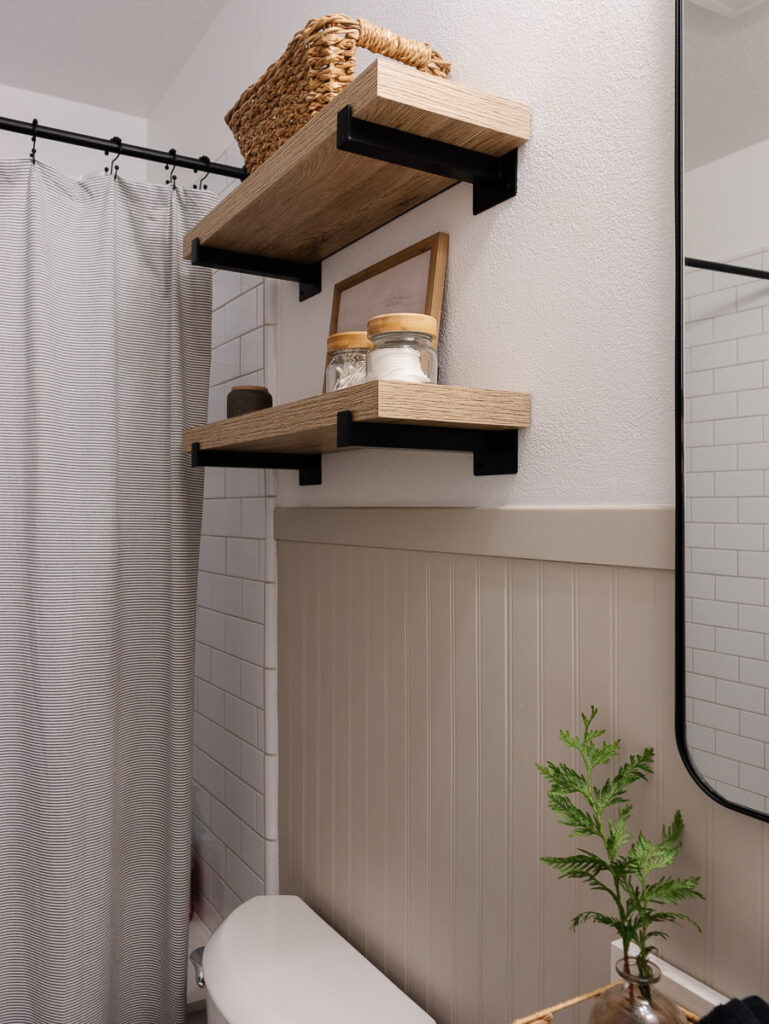
Small bathrooms can be challenging to decorate, but they don’t have to be! If you’ve been following me on Instagram for a while, you know that we remodeled this bathroom over a year ago. Time flies when you’re having a good time!
This is the guest bath and the bathroom the kiddos share. It’s a small space and can be challenging to decorate. I’ve had some practice since we remodeled and have compiled my top 5 ideas to make small bathrooms both inviting and functional!
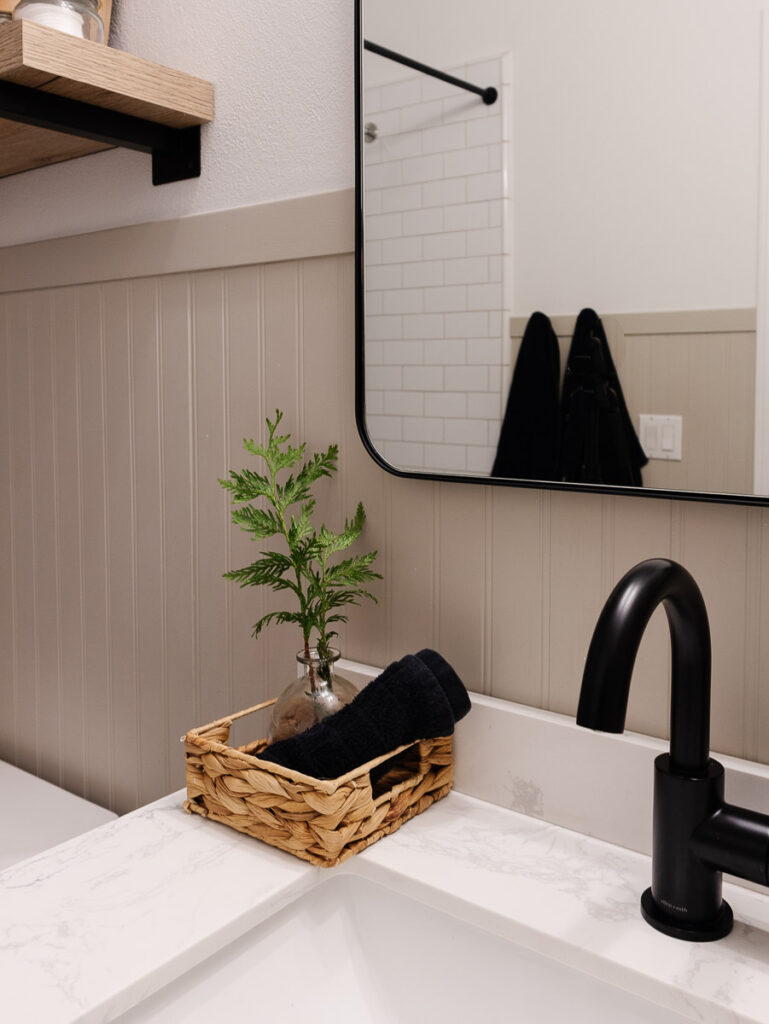
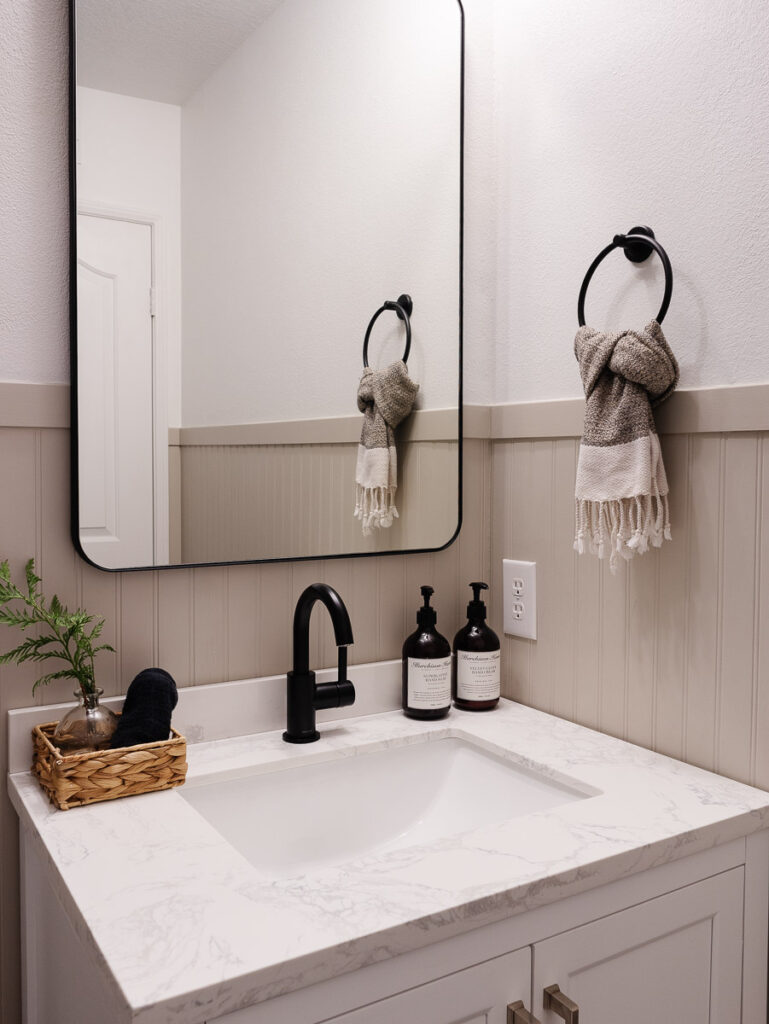
- Use a basket/tray on your countertop to keep face towels
Since we lack storage in our small bathroom, having a basket or tray on the countertop creates additional storage for face towels which looks great and is functional at the same time!
- Use amber soap/lotion bottles
There’s something about amber bottles that just says luxury to me! They look so pretty, and I use plastic bottles that are easily reusable. I also like using plastic because I don’t have to worry about them breaking as easily. Amazon has some great options, but I like to reuse mine from Murchison-Hume. Their products smell amazing!
- Display art
I like finding inexpensive digital prints on Etsy. This way if they get damaged, they are easily replaced. This is also a budget friendly way to swap out your art as frequently as you’d like.
- Get some cutie containers to keep the essentials
I prefer to use clear containers to keep things like q-tips and cotton pads. This makes it easier for guests to find what they need. These don’t have to boring, but make sure they are large enough to fit your items.
- Add open shelving above your toilet
This has become a huge trend over the last few years and for good reason! Shelves create much needed additional storage in smaller bathrooms. They’re also really fun to decorate. If you’re working with a tighter budget, you can easily DIY some.
Happy bathroom decorating!
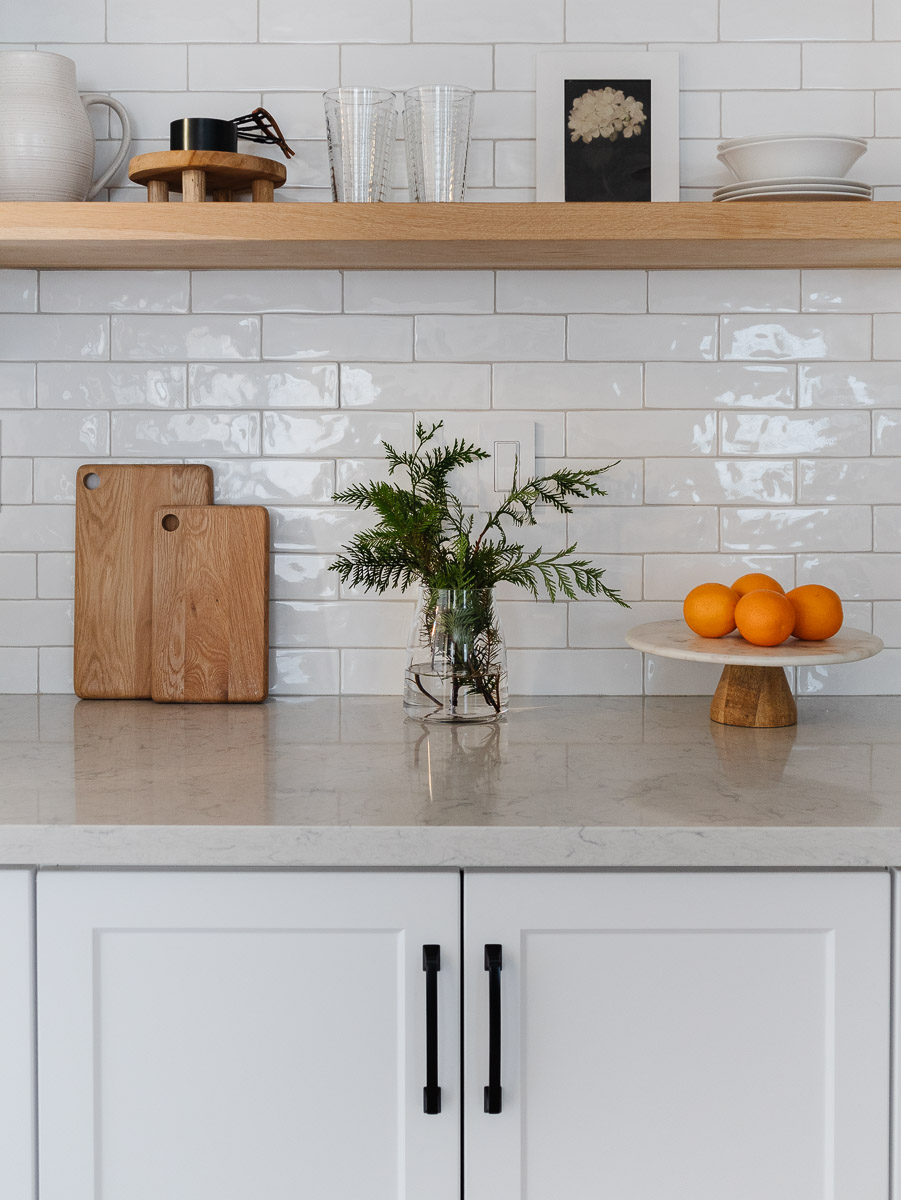
It can be tricky to decide how to decorate after the Christmas decor has come down. My goal with decorating after the Holidays is to make it warm and inviting, and the kitchen is the perfect space to do this. Here are my favorite ideas to transition your kitchen from Christmas to Winter!

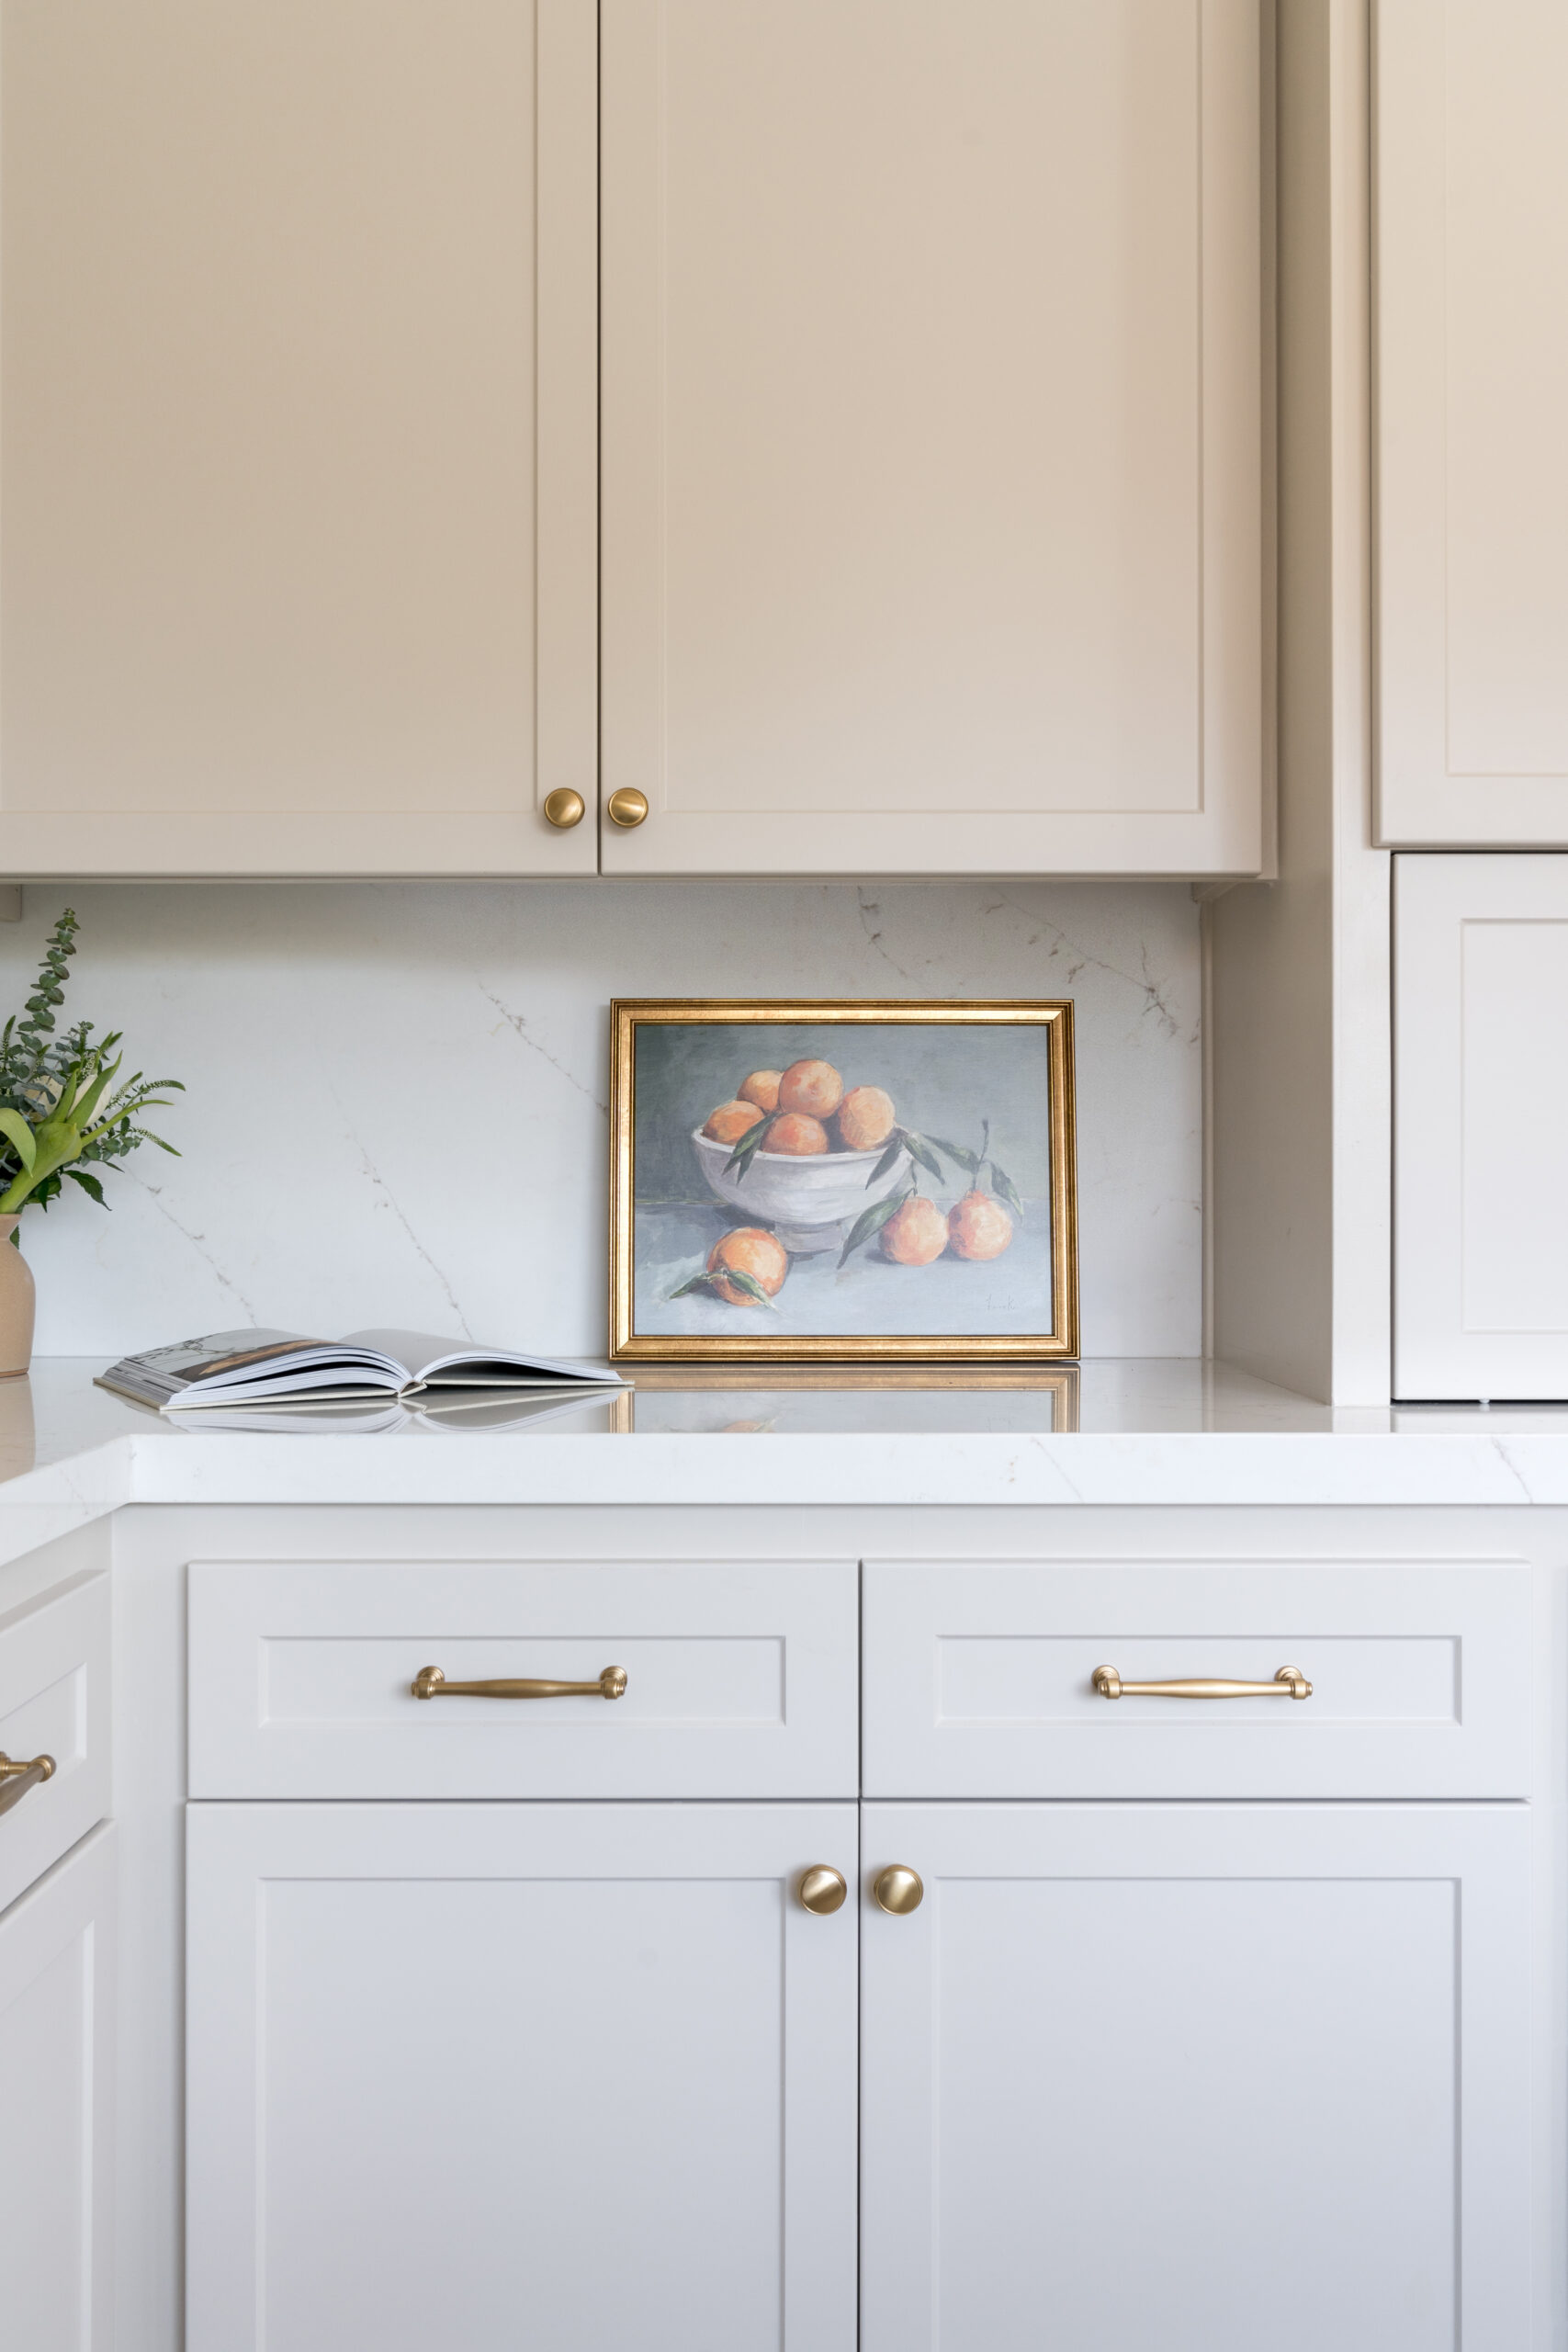
- Display fresh fruit
This is such an easy and inexpensive way make your kitchen feel inviting. I like to display oranges on a cake stand, which adds color to our kitchen and makes it look pretty. You could also display lemons and limes.
Pro Tip: Make Pomander Balls using oranges and cloves! Not only will the oranges look great, but they will make your kitchen smell delicious.
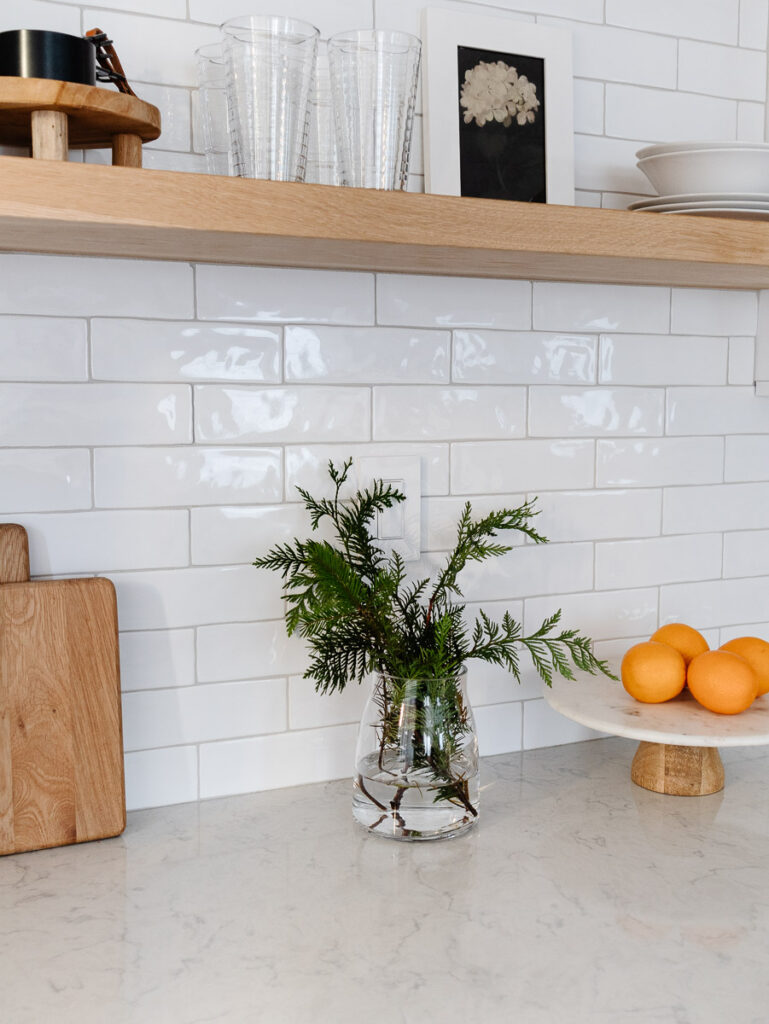
- Keep the winter greenery
Use your leftover winter greenery to display in your kitchen. I like using cedar and juniper, but you could also use pine, blue spruce, and silver dollar eucalyptus.
Pro Tip: If you want to avoid the mess that comes with fresh winter greenery, opt for faux. It will look just as great, but with less mess!
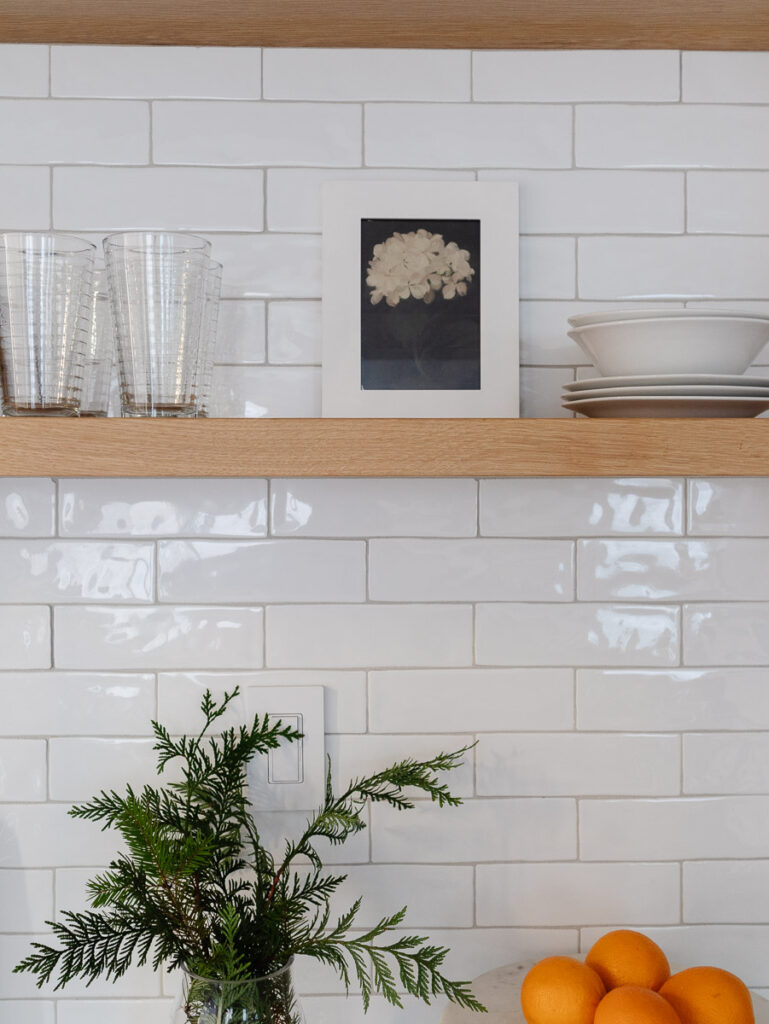
- Add moody still life prints
I love printing my own art at home. It’s easy to find a variety of art on Etsy that’s reasonably priced. You can search ‘Winter prints’ to find some amazing pieces.
Pro Tip: Use wood toned frames, which will help warm up your kitchen.
- Use warm colored kitchen towels
This one makes such a difference! I typically like using light colored kitchen towels, but in the winter months I like mixing it up with some olive or caramel colored towels.
Pro Tip: Shop for kitchen towels early before the holiday season so you can use them through the holidays and into the winter season!
- Make some stovetop potpourri
I love me some stovetop potpourri! It is so easy to whip up, makes your home smell great and it’s easily made with ingredients you probably already have.
Pro Tip: Don’t just make stovetop potpourri during the winter, make it year-round to make your home smell amazing.
Happy Decorating!
Check out my tips on transitioning your fireplace mantel from Christmas to Winter here.
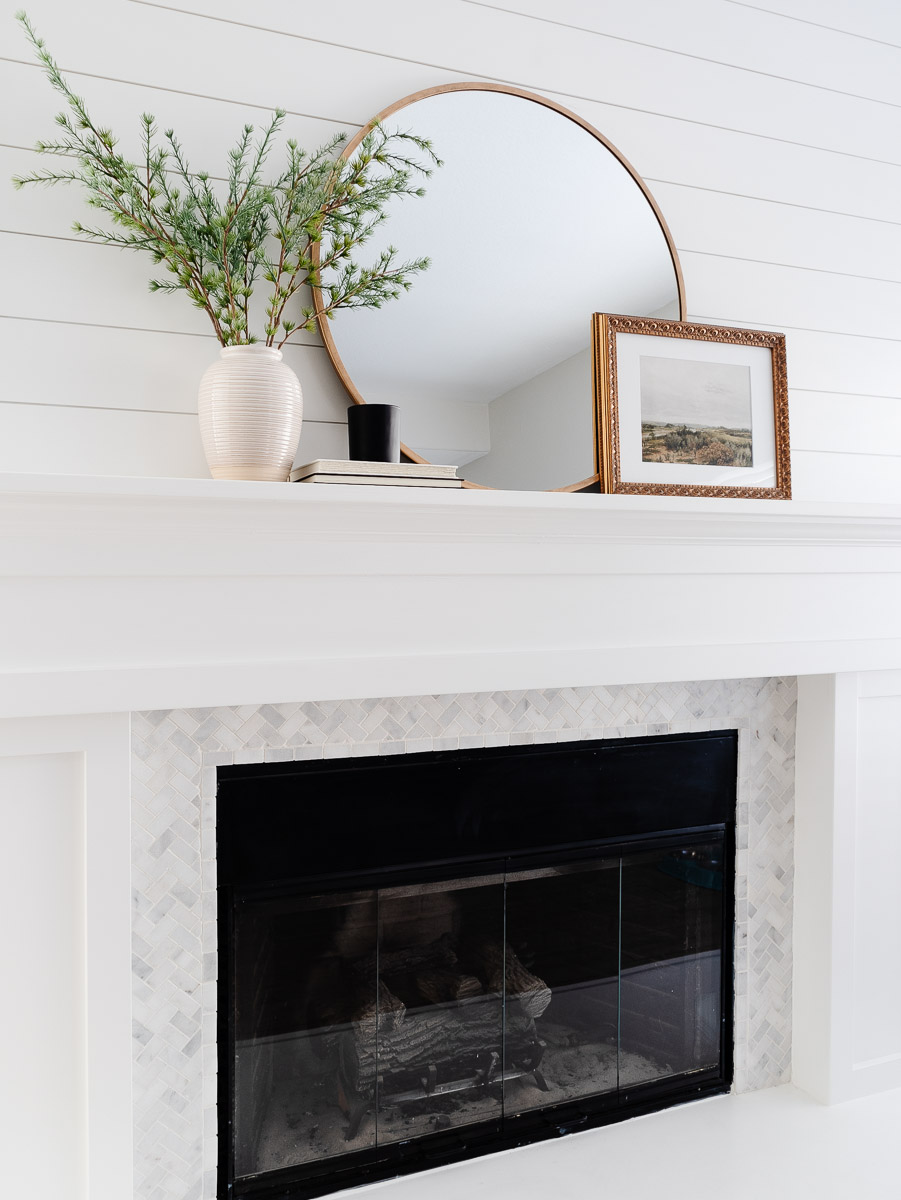
Decorating the fireplace mantel after Christmas is bittersweet because it means all the Christmas decor has been put away, but it also provides a blank slate to refresh the space! My goal for winter decor is to keep it minimal but cozy. Here are my simple tips for decorating your fireplace mantel after Christmas.

- Add brass pieces
Brass is great for warming up any space. Adding brass accents to your mantel will immediately give it that cozy feeling. Thrift stores are a great place to find vintage brass decor that will look beautiful on your mantel.
Pro Tip: Try using different shades of brass that complement each other. This will prevent your mantel from falling flat if you’re using multiple brass items.
- Use nature inspired home décor such as pinecones
Another way to create a cozy mantel is to use nature inspired home decor. I like using pinecones because they look great against the brass! I usually just use the ones I have left over from the Christmas decor.
Pro Tip: Display your pinecones in a small decorative bowl. This will give them such a designer look!
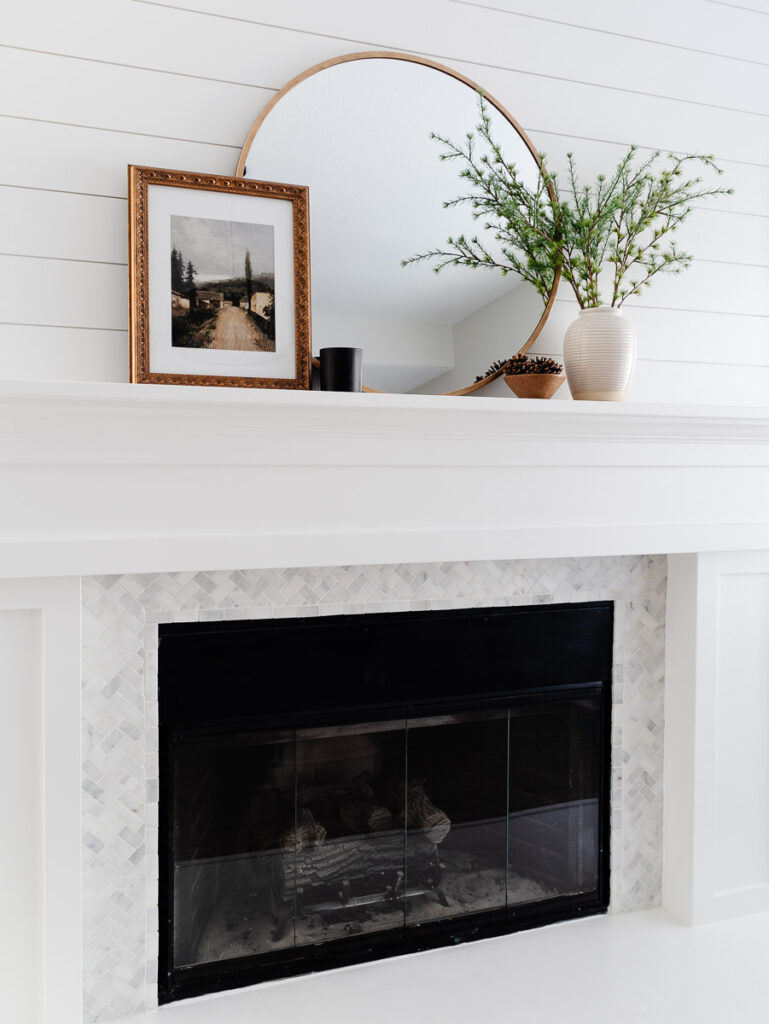
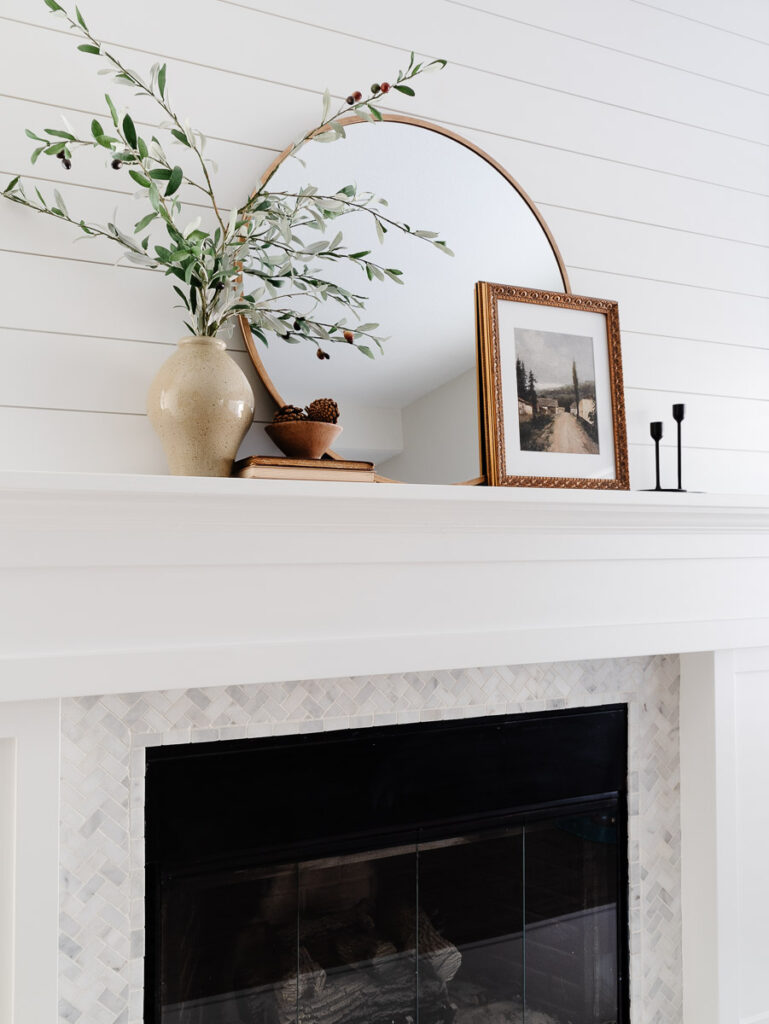
- Add winter greenery
I just love winter greenery! I prefer using faux winter greenery on the mantel, but if you can find the real stuff then even better!
Pro Tip: Olive branches are a great substitute for winter greenery. They give the space a soft look and easily transition into Spring.
- Don’t forget the moody art
Moody art on a winter fireplace mantel is a must! It really completes the look of the mantel decor. If moody art isn’t your thing, I think landscape prints also look great!
Pro Tip: My favorite place to shop for art prints is Etsy. The best part is that you can print them right at home.
May your winter mantel be as fabulous as you!
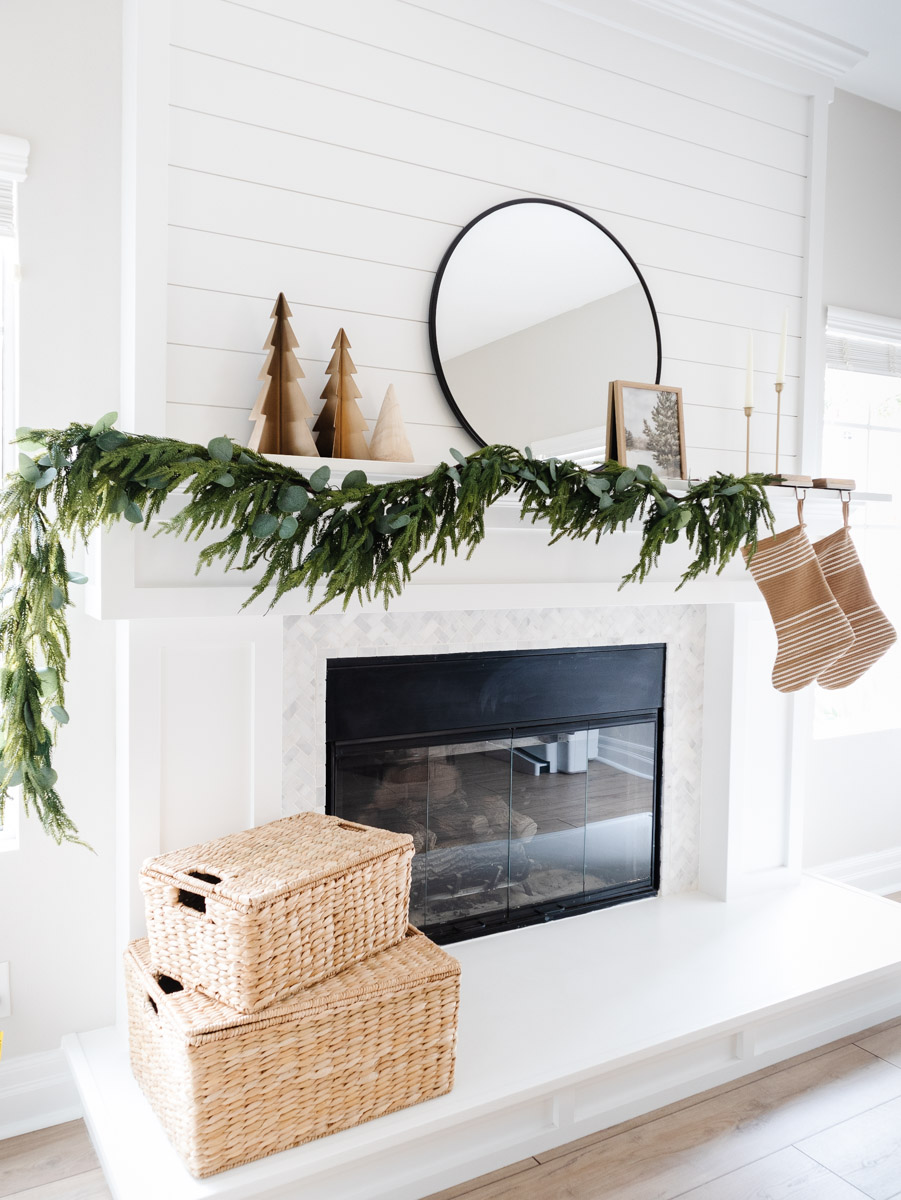
I love neutral Christmas Mantel decor! There’s something special about subtle Christmas decor that makes home feel peaceful and joyful.

Here are a few ways to dress up your fireplace mantel while keeping it simple and neutral:
- Add green foliage
I love a good garland! My favorite types of garlands are faux cypress and pine. I also like to mix the two, which tends to give the garland an elegant look. This year, I decided to mix in some faux eucalyptus. I purchased some inexpensive eucalyptus stems from Amazon and placed them throughout the garland.
Pro Tip: Try placing your garland asymmetrically on your mantel. It totally elevates the look!
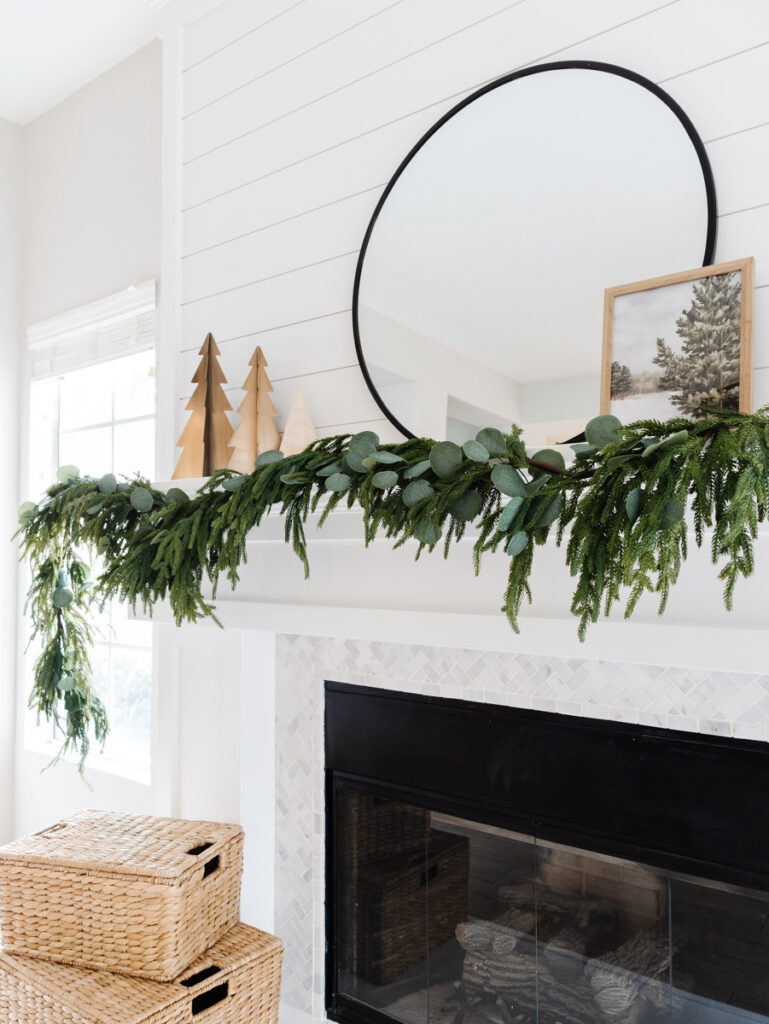
- Choose Christmas accents that are gold and natural wood color
When selecting the other items to add to your mantel, stick to gold and natural wood-colored items. Not only does gold and natural wood look great against the green foliage, but it also adds a softness to your Christmas decor.
Pro Tip: Frame a piece of art in either gold or natural wood. The key here is simplicity.
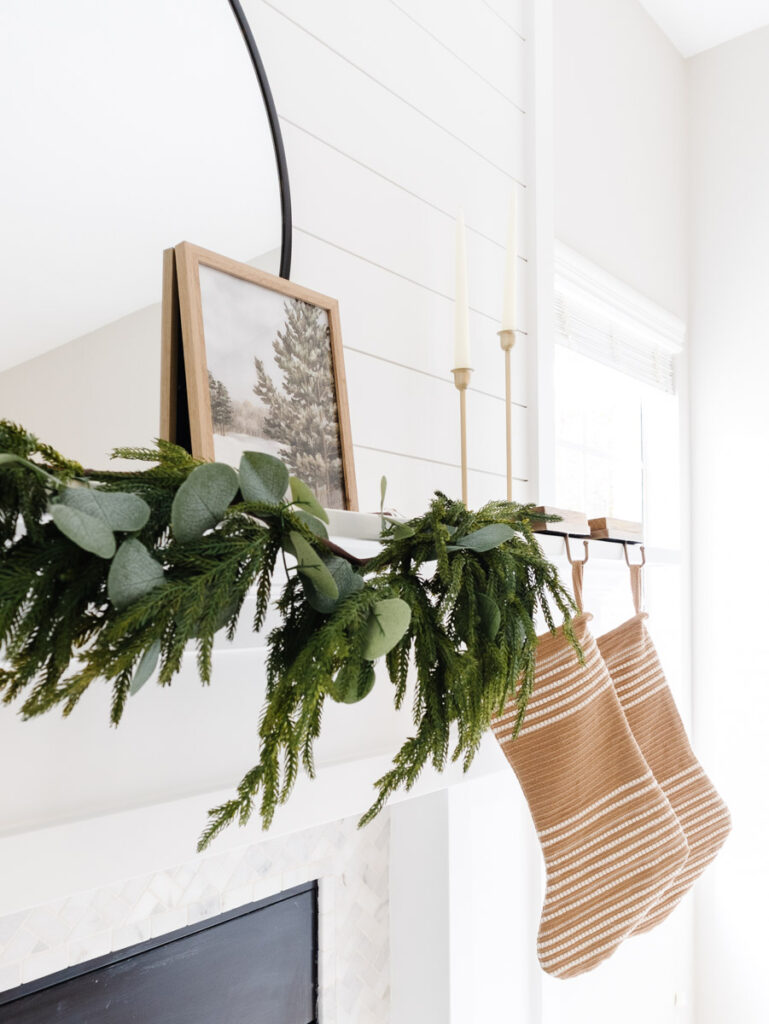
- Add a focus piece
It’s easier to decorate your mantel by starting with a focus item. For me, this was a round black mirror. It provides a good focal point to work from. I then like to add the tallest items on the very outside of either side of the mirror and work my way in. I try to group items together in either 2’s or 3’s, but don’t be afraid to mix up your items until you’re happy with how they look!
Pro Tip: Make your focus piece a mirror. Not only will the mirror make your space look larger, but it also makes for great photos!
I hope this helps you create your perfect neutral Christmas mantel this year! As always, thank you for being here.

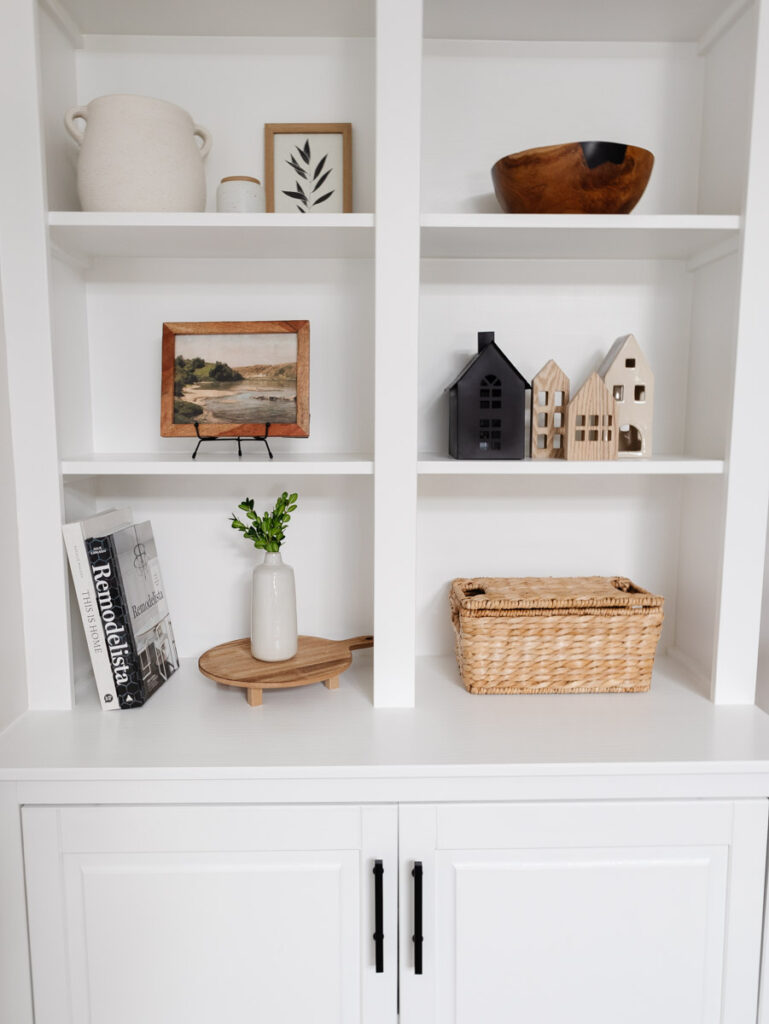
I love bookshelf styling! But I must keep it real, I used to struggle so hard when styling our built-in bookshelf. There was this one time where it took me 3 hours to style this space!
I’ve curated some of the best styling tips to help next time you’re styling your bookshelves and added bonus, this is a great way to style your shelves for the winter/holiday season!
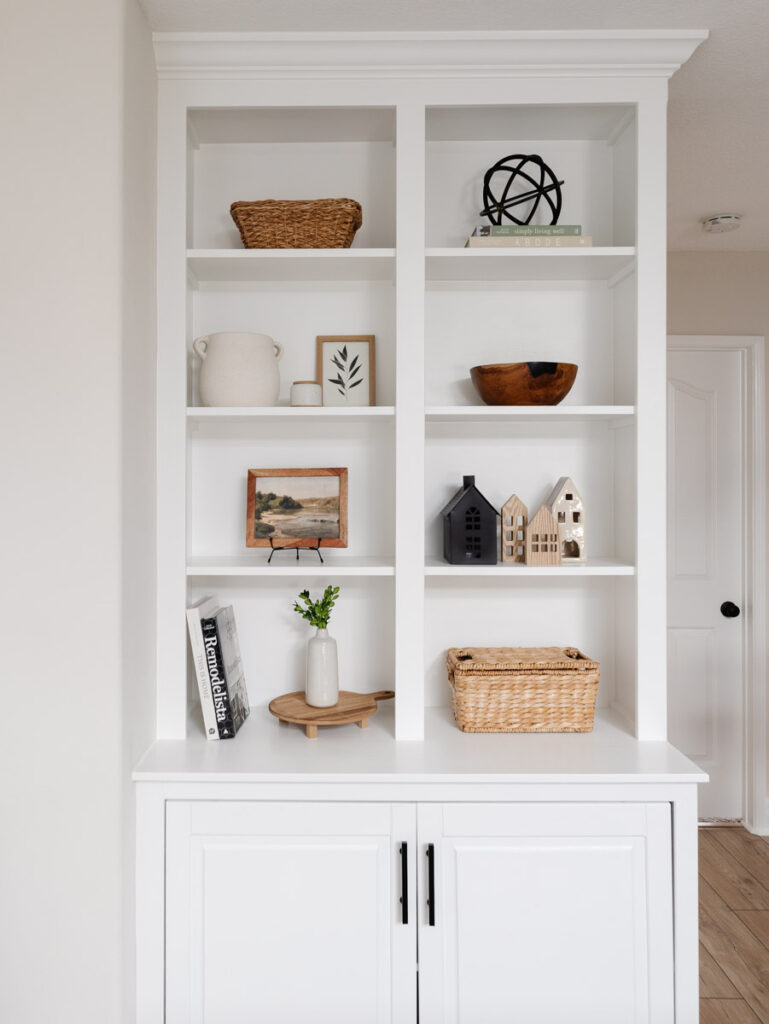
- Select 3 base colors
Start off by selecting 3 colors you are going to use as your base. Since our home is mostly neutrals, I selected brown, black, and beige. This will help create consistency throughout your shelves.
Pro Tip: Select at least one achromatic color (white, black, grey), which will make it easier to select the other 2 base colors to work with. For example: grey, blue, and white OR black, cream, and green.
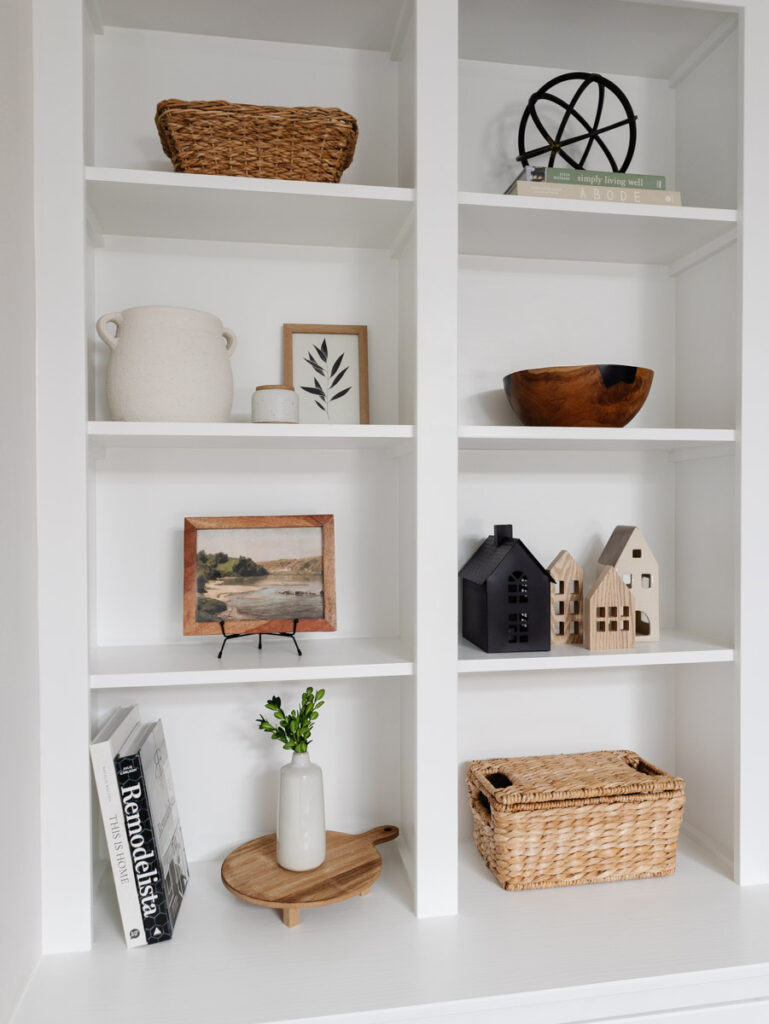
- Compile your decor items and make sure they are of different shapes, heights, and widths
Having the base colors selected will makes it easier to find items to incorporate into your styling. Now, it’s time to have fun with the other items you’ll add and think about how many items you want to see on each shelf. This is really about personal preference. I like to see some type of balance while minimizing the busyness. Again, this is all about what you like.
Pro Tip: Source local antique or thrift shops for unique items to add to your shelves. I like using Yelp to find shops near me.
- Rearrange until your heart is happy
There is no one size fits all for bookshelf styling. Rearrange, rearrange, and rearrange again! You’ll know when an item is in its correct place.
Pro Tip: Each time you rearrange items, take a photo. There is something about looking at your styling through a photo that makes sense. It also helps you remember where items looked good so you can refine your styling.
My favorite tip of all, have fun!


